As a self-proclaimed mad scientist of sorts, my workspaces often resemble a chaotic laboratory – notes, books, and projects scattered about. Yet, amidst this whirlwind, there’s one sanctuary where I thrive: my garden. Amidst the lush greenery and vibrant blooms, I maintain an unexpected level of organization. My secret? A meticulous approach to tracking plantings, ensuring I can easily recall what, when, and where I’ve planted each variety.
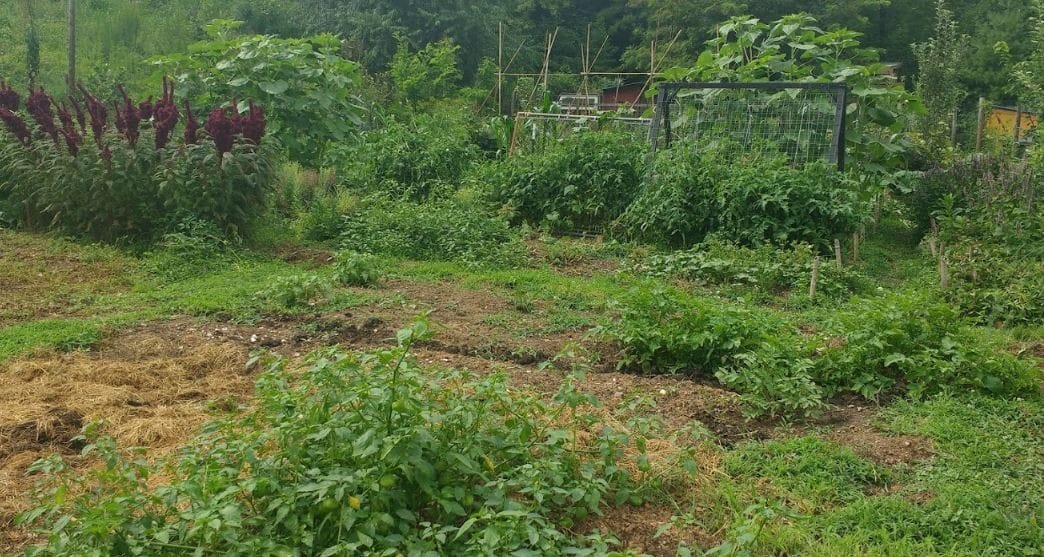
As a novice gardener, keeping track of a few simple veggies like peas, lettuce, and cucumbers is manageable. However, as the scope of your garden expands and the number of varieties grows, maintaining order becomes increasingly daunting. The sheer diversity of cool-season greens, warm-season squash, melons, herbs, and more can lead to confusion. That’s why every gardener seeking to take their skills to the next level must master these three essential steps for achieving good garden organization.
The Key to Garden Organization
To truly tend to your garden’s potential, start by creating a comprehensive plan – not a literal key, but rather a visual representation of your outdoor space. This sketch will serve as the foundation for your planting strategy, allowing you to effectively map out your varieties and rotations. By doing so, you’ll be able to monitor progress, identify areas for improvement, and make informed decisions about future plantings.
Step 1: Sketch and Number Garden Beds
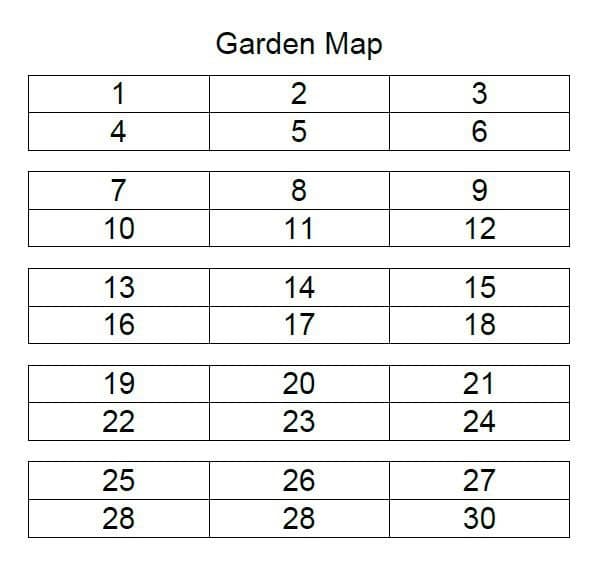
To efficiently plan and keep track of my garden beds, I maintain a sketch of the layout. This visual representation allows me to easily identify the individual plots, which are numbered starting from 1 up to the total number of beds. In addition, I create a separate list that details the various planting varieties and their corresponding dates. By linking each entry to its respective bed number, I can maintain order and organization throughout my garden journal.
In my case, I have rows that are three feet wide, spanning a total length of 40 feet. While some beds may be dedicated to a single crop, such as sweet potatoes, others may feature a mix of vegetables – typically ranging from three to six different varieties in a given row. To facilitate labeling and record-keeping, I treat each planting section within a bed as its own distinct entity, assigning it a unique number.
Step 2: Make a Key
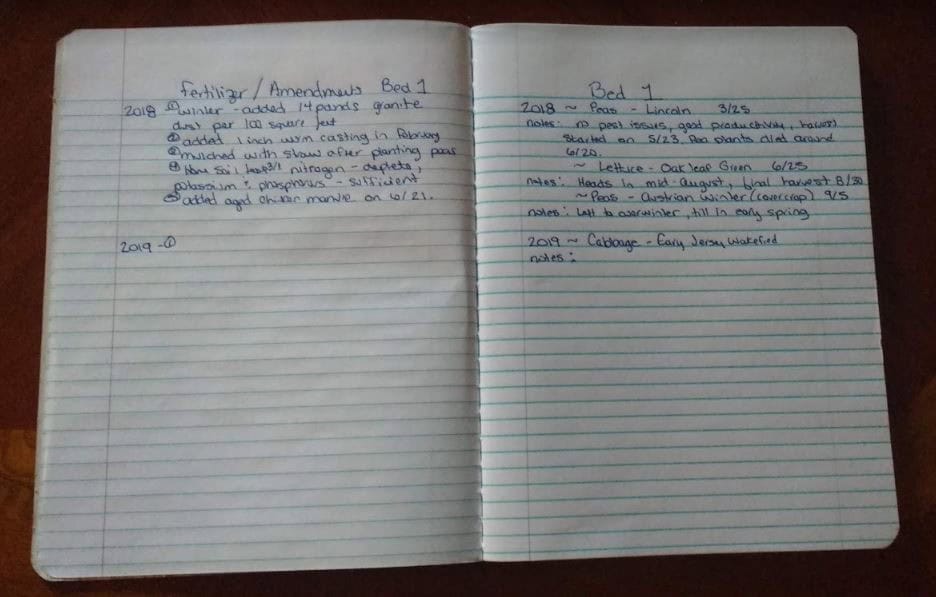
To effectively manage my garden’s crop rotation plan, I maintain a comprehensive notebook where I record planting details for each bed over a five-year period. As I start a new notebook, I dedicate a few pages to each numbered bed, allowing me to document key information such as planting dates, performance notes, fertilization schedules, cover crops used, and harvest times.
This structured approach enables me to ensure that I don’t repeat the same families of plants in each bed more frequently than every five years. The right side of my notebook is reserved for recording planting history, including specific varieties, while the left side is dedicated to noting fertilizer and soil amendments used, as well as highlighting important test results from any soil tests taken.
While it’s possible to maintain this information digitally, I find it more convenient to record data by hand in my notebook as I plant, allowing me to easily carry it with me to the garden.
Step 3: Label Your Beds
With the map and key in hand, the next logical step is to assign labels to each bed in the garden. While it’s true that you can always refer back to your key if needed, labeling the beds provides a convenient visual reference point, allowing you to quickly monitor seedling growth and plant progress without having to consult notes or devices every time you tend to your garden.
Plant Labels as a Garden Tool
By incorporating plant labels into your gardening routine, you can unlock a multitude of benefits. One effective approach is to include essential information such as the plant’s name, variety, and planting date on each label. This organized system enables seamless weeding, informed decision-making regarding plant care, and fosters a deeper emotional connection with your garden.
Early Weed Identification
When it comes to vegetable seedlings, they’re often easily distinguishable from weeds even in their early stages of growth. For instance, cole family crops like cabbage and turnips typically exhibit two cotyledons that resemble cut-in-half four-leaf clovers. In contrast, these seedlings are noticeably larger than most broadleaf weeds and lack the characteristic grass-like appearance.
By familiarizing yourself with the expected characteristics of each vegetable type and its corresponding seedlings, you can confidently start weeding early on. This is particularly important when experimenting with new heirloom plants, as their germinated forms may be unfamiliar to you. To avoid mistaking these newcomers for weeds, take the time to label the spot where they were planted, ensuring a seamless identification process.
Germination and Growth Tracking
When it comes to monitoring plant growth, using planting dates can be a valuable tool. For instance, if mustard seeds don’t emerge within a week of planting, it’s likely that birds have gotten to them, or the seeds are poor quality, or the conditions are too warm for germination. On the other hand, if you notice grass-like leaves popping up in your carrot beds just a day or two after planting, it’s probably not carrots, but rather grass that resembles them at this early stage.
Carrots typically take around 14-21 days to germinate from planting. By knowing how quickly plants are supposed to grow, you can quickly identify if they’re on track for good production. For example, with fast-growing radish varieties like French Breakfast, if they don’t start bulbing up within a couple of weeks after planting, it may indicate that your bed is lacking in some essential mineral or water.
By monitoring planting dates and keeping an eye on plant growth, you can easily spot problems and take corrective action to ensure the health and productivity of your plants.
Not-So-Plain Garden Variety
When it comes to gardening, I believe that showing plant variety labels is essential because it adds a personal touch. Just as knowing someone’s name rather than simply referring to them as ‘the mailman’ or ‘the UPS driver’ gives them a sense of identity, recognizing the unique characteristics of each plant variety elevates their significance.
This becomes especially important when working with heirloom varieties, where the label can provide valuable insight into the plant’s history and cultural context.
Plant Markers for Functionality
For gardens of all sizes, accurately identifying plants is crucial. While commercial labels can be effective, making your own DIY plant labels can be a cost-effective and personalized solution. Here are some straightforward approaches to creating functional labels that cater to various garden types.
Ice Cream Sticks
When it comes to documenting plant care instructions, consider repurposing everyday materials that won’t break the bank or harm the environment. A simple yet effective solution is to utilize inexpensive craft store ice cream sticks, which can be written on with permanent marker. Not only are these sticks affordable, but they’re also compostable at the end of their life cycle. For a colorful alternative, paint sticks can serve as a viable option for recording vital vegetable information.
Plastic Forks
Reinventing the humble plastic fork, often relegated to a one-way trip to the trash can, becomes a creative canvas when paired with a permanent marker. This eco-friendly hack breathes new life into post-celebration leftovers and holiday party supplies that would otherwise contribute to waste management woes.
Clothespins
To create a unique and practical plant identifier, write your plant information on a clothespin using a fine tip marker. Once complete, attach the labeled clothespin to a branch or chopstick for easy reference. A clever hack is that these can be reused by simply rinsing them off after use and returning them to their original home – the laundry line.
Plant Markers for Decoration
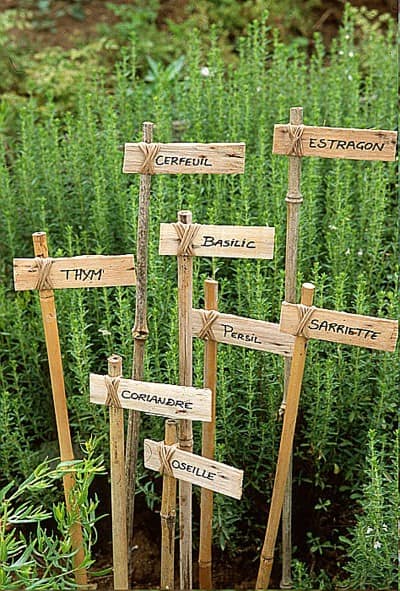
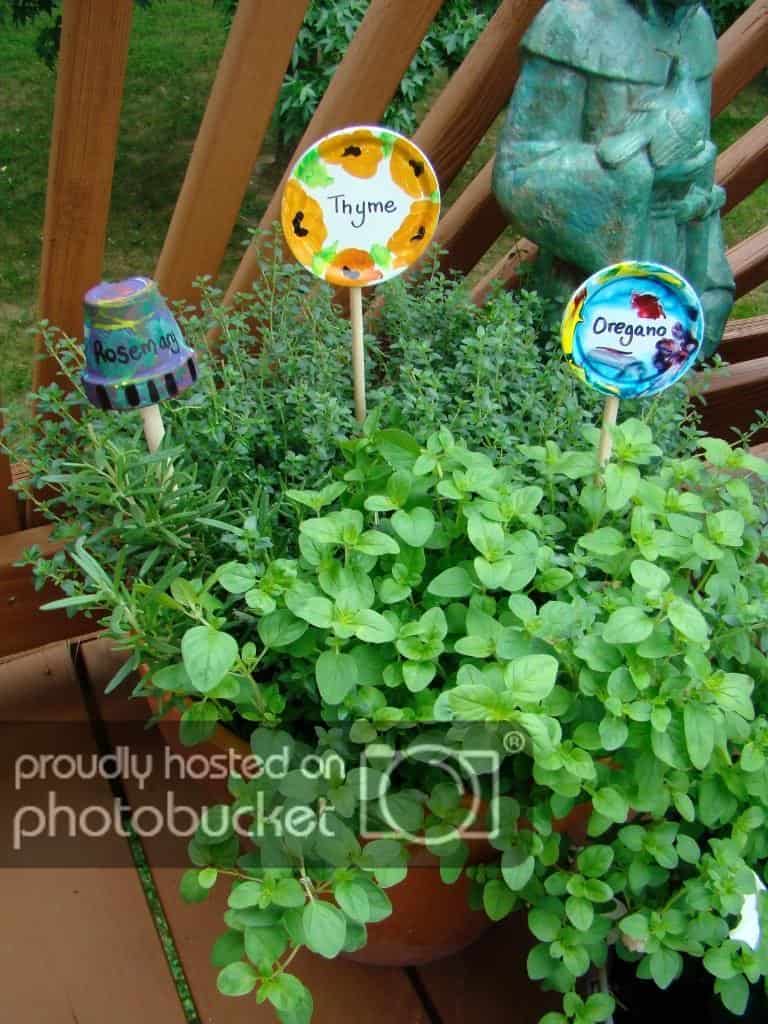
When it comes to garden labels, many people stop at just functionality, but taking the time to make them decorative can elevate your entire potager (a charming ornamental vegetable garden) or garden space. As plants are young and still in their early stages of growth, beautifully crafted labels can add a touch of whimsy and charm to your beds. To match the unique character of your garden, choose decorative labels that fit its theme.
Rustic, country-inspired labels complement the natural beauty of a rustic garden setting, while painted, ornate labels are perfect for a charming cottage garden. By incorporating decorative labels into your garden design, you can add an extra layer of personality and visual interest to your space.
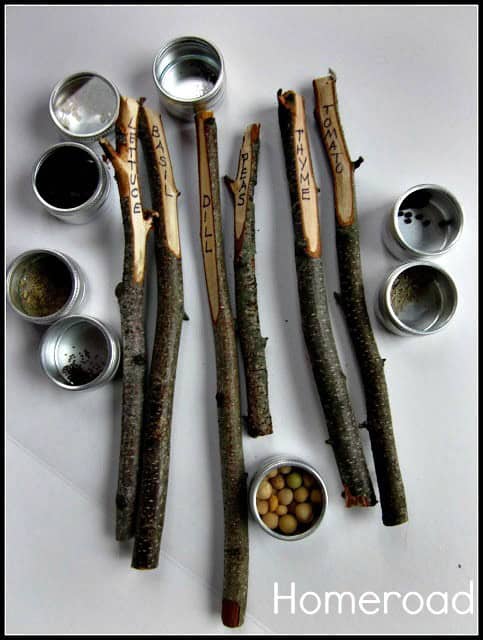
Right From the Woods
Creating rustic stakes is a straightforward process that requires just a few simple materials. To get started, you’ll need some softwood branches, a good quality vegetable peeler, and a permanent marker. The latter will come in handy for adding the necessary details to your stake. A large-tipped marker works well for applying the vegetable type, while a small-tipped marker is perfect for including the variety and planting date.
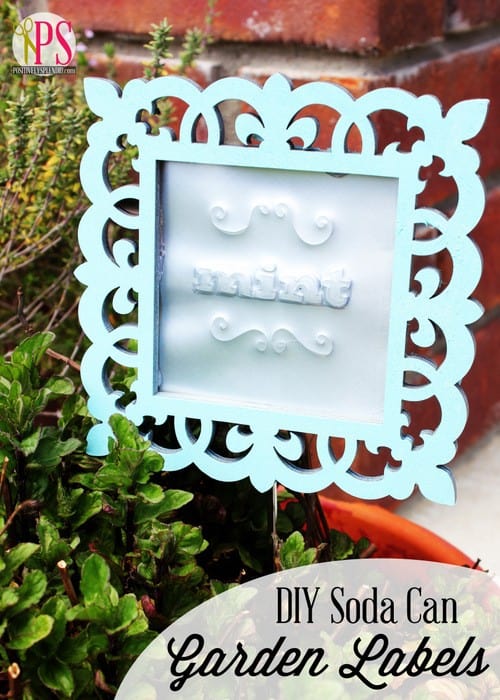
Sweet Like Soda
What adds an extra layer of charm to a Shabby Chic or French-inspired garden are these delightful plant markers, crafted from repurposed materials. One such example is the clever use of a stamped soda can, paired with a scroll saw frame attached to a skewer, creating a whimsical and rustic touch that perfectly complements the aesthetic of these styles.
The Classy Cork and Fork Combo
I’m quite fond of using corks as plant markers, and my approach is often low-key. I simply pair them with free chopsticks that friends who dine out thoughtfully collect for me. Nevertheless, if you’re looking to elevate the humble cork label experience, consider adding a fork and some twine to the mix. This thoughtful touch can transform plain corks into sophisticated plant markers.
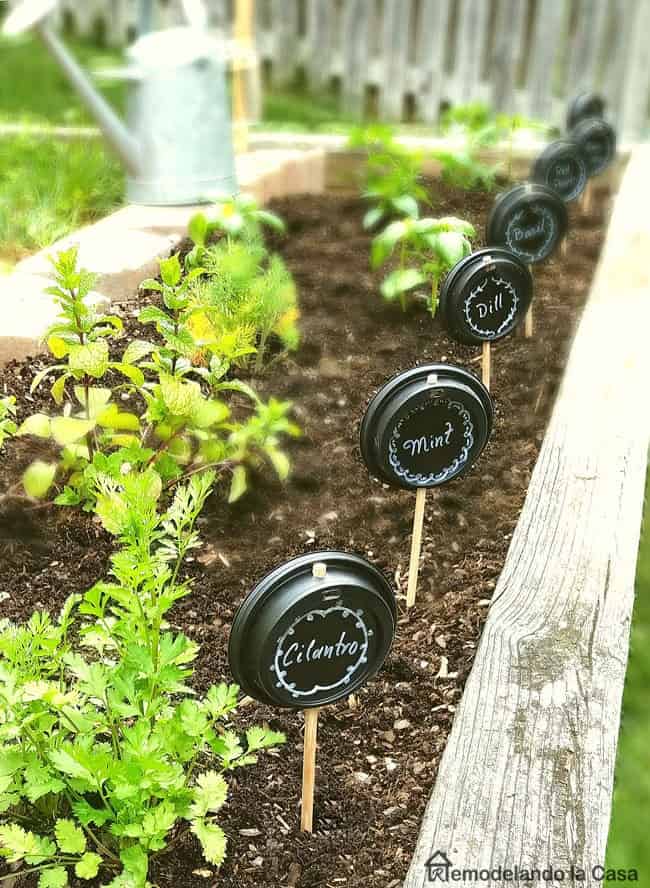
The Coffee Lover
Repurpose those daily coffee lids and turn your gardening guilt into a creative opportunity! The black covers with white writing can create a charming farmer’s market-inspired vibe, reminiscent of a vintage chalkboard. But don’t stop there – experiment with different colors to inject a pop of personality into your eclectic garden. Whether you’re a seasoned green thumb or just starting out, this simple hack is an easy way to add some whimsy and flair to your outdoor space.
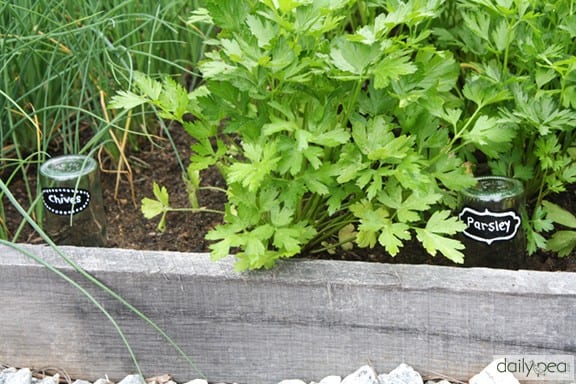
Glassy and Classy
Transforming empty wine bottles into functional and decorative pieces for your garden is a simple yet effective way to reuse and recycle. With a little creativity, some glass paint, and a brief moment of leisure, you can turn those discarded containers into charming chalkboard-style plant markers or decorative accents that add a touch of personality to your outdoor space.
Lollipop Lid Lifters
Transforming leftover canning supplies into functional items is a creative way to reduce waste. Take, for instance, old jar lids that can be repurposed as charming plant markers in the shape of lollipops. This DIY project is an excellent activity for kids to engage with their gardening endeavors.
Bamboozled
Among my top picks, these compact beauties stand out due to their understated elegance and striking stature. The plan is to incorporate them into my garden by using slightly larger signs to display the names of various plant species, allowing visitors to easily identify and learn more about each one.
Conclusion
While disorganization may prevail in other areas of life, maintaining a sense of order in the garden is crucial for its success. A garden map and key, along with functional or decorative plant labels, can significantly streamline gardening tasks. Furthermore, transforming ordinary plant labels into unique works of art not only adds visual interest as seedlings emerge but also fosters creativity and a deeper connection to one’s garden.
By embracing organization and injecting personal flair, even the most novice gardener can elevate their skills and enjoy a more rewarding experience.
