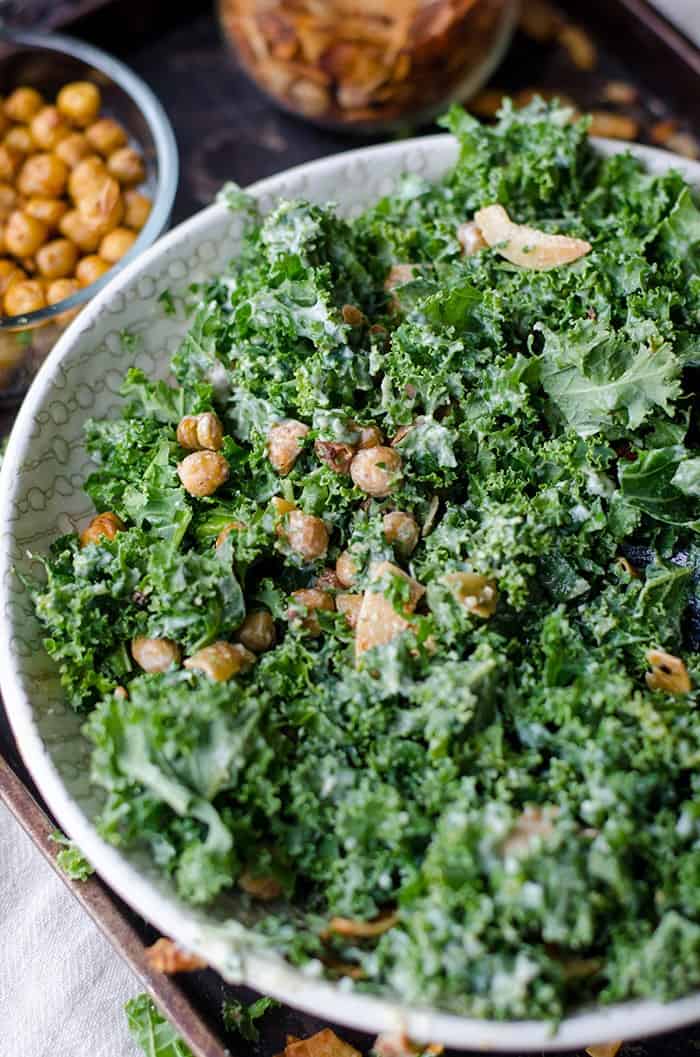
Kale is a true favorite of mine. Its impressive nutritional profile, delectable flavor, and low-maintenance growth habits make it an ideal addition to any garden. A single plant can provide a bountiful harvest throughout the year, with some varieties even thriving in the face of frost or winter weather.
My enthusiasm for kale extends beyond its culinary appeal – I also enjoy experimenting with different varieties and observing the unique characteristics that emerge when different types are crossed. In many ways, kale is a marvel of nature. While it’s true that kale can be susceptible to pests, the rewards far outweigh the challenges. With proper care and attention, this hardy green can provide a continuous supply of fresh greens for months on end.
Whether you’re a seasoned gardener or just starting out, I believe kale has something to offer everyone. In this comprehensive guide, we’ll delve into the world of kale cultivation, exploring its various varieties, care requirements, and tips for overcoming common issues. Whether you’re looking to add some greenery to your plate or simply enjoy the process of growing your own food, kale is an excellent choice.
Kale Varieties
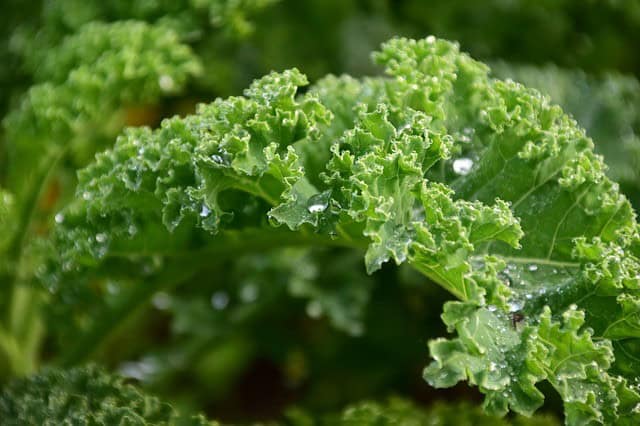
Kale varieties are a personal favorite of mine, and I’ve had the pleasure of experimenting with many different types over the years. Each season, I select a few new ones to try out alongside my tried-and-true favorites, to see which ones grow best and produce the most flavorful leaves. Some of my top picks include Blue Curled Scotch, known for its densely curled leaves that add a pop of color to any plate.
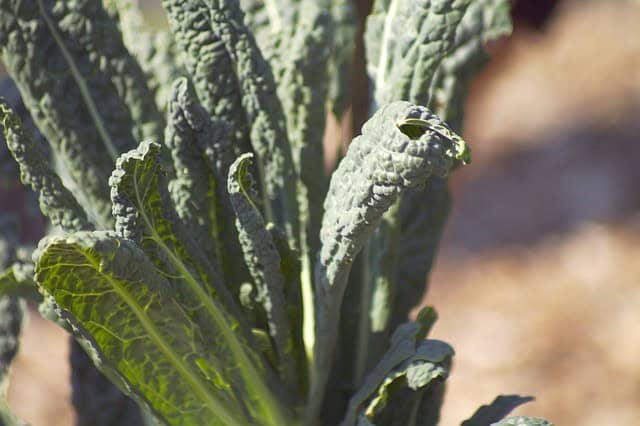
Lacinato, or dinosaur kale, is another favorite of mine – its unique palm tree-like appearance makes it a showstopper in the garden, and its leaves taste great cooked or raw. Red Russian kale boasts broad, green leaves with purplish veins, adding a touch of elegance to any dish. White Russian, on the other hand, is perfect for northern gardens, where its cold-hardiness really shines.
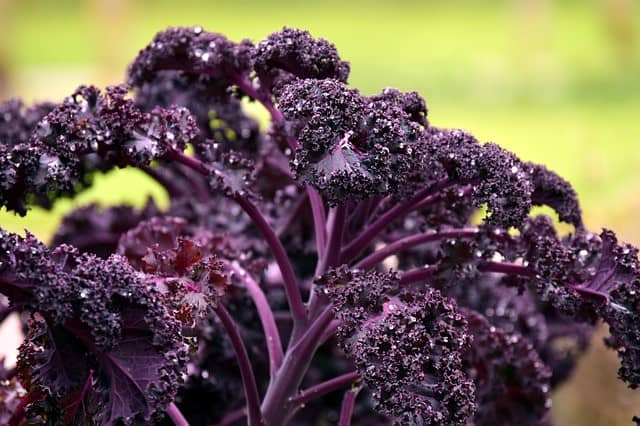
Other standouts include Red Ursa, with its smooth leaves and slightly sweet flavor; Darkibor, whose curly leaves have a deep, dark green hue; Meadowlark, which produces thickly curled kale with a sweet flavor and excellent cold-resistance; Scarlet, an all-over purple hybrid that’s both prolific and easy to spot due to its dark leaves; Siberian, which boasts super tender leaves and rapid growth; Vates, a dwarf kale perfect for containers; Westlander, whose bright green curly leaves make beautiful bunches; and Winterbor, with its lovely blue-green, ruffled leaves that are one of the most cold-hardy kales around.
Planting Kale
One of the most appealing aspects of cultivating kale is its ease. Regardless of whether you choose to begin the process by starting your kale indoors or directly in the great outdoors, this versatile and nutritious plant is surprisingly uncomplicated to grow.
When to Plant Kale
Kale is a versatile cool-season crop that can be direct sown in early spring or started indoors for a head start on the growing season. I prefer to begin with seedlings and transplant them outside when the weather warms up, allowing me to harvest sooner. For indoor seeding, wait until 3-5 weeks before the last frost date. When transplants are ready, harden them off for 10 days before moving them into their permanent location when they have three leaves and temperatures reach 50°F.
This approach ensures a quicker harvest once the gardening season begins.
While kale thrives in cooler weather, it’s surprisingly resilient to warm summers, which won’t cause it to bolt or die off. In fact, this adaptability makes it one of my go-to crops for year-round harvesting. If you prefer to grow extremely cold-hardy varieties, you can sow them in the fall or winter and ensure they have enough time to mature before frost sets in.
For a winter harvest, make sure your kale has sufficient time to grow before the first frosts arrive. In colder climates, you may need to protect your crop with a cold frame or heavy mulching, but otherwise, kale is an excellent source of sustenance during the winter months. In zones 8-10, kale can be planted and harvested all year round.
Light & Soil Requirements
While kale can thrive in partial shade, it’s not opposed to basking in full sun either. If your garden receives ample sunlight, you can expect rapid growth from your kale plants – just be sure to mulch around the base to retain moisture. However, kale is surprisingly adaptable and can grow well in a range of conditions. In terms of soil quality, loamy, well-drained terrain with a pH between 5.5-6.
8 is ideal, but it’s not particularly picky – making it an accessible choice for gardeners of all skill levels.
Where to Grow Kale
Kale’s versatility makes it an excellent option for gardeners with limited space. Its compact nature allows it to thrive in containers, adding a pop of color and texture to any arrangement. Many cities incorporate kale into their urban landscapes, using its decorative value to enhance flower plantings. Whether you have a balcony garden or a traditional in-ground bed, kale is an adaptable choice that can flourish in a variety of settings.
As for climate, kale thrives in zones 7-10, making it accessible to many gardeners.
Germination Time
When it comes to sowing kale seeds, one crucial factor is the soil temperature. Kale seeds tend to prefer cooler soil conditions, which can actually facilitate germination. The time it takes for kale to sprout also varies depending on the specific variety, but as a general rule, it tends to germinate more quickly than other plants. As you wait patiently for those first signs of life, be prepared for sprouts to emerge in less than a week.
Spacing Kale
When cultivating kale, the ideal spacing depends on the specific type you’re working with. To achieve optimal results, I take an experimental approach to spacing, as different varieties have distinct requirements. For instance, when growing baby kale greens, I typically plant four plants per square foot, leaving a minimum of 12 inches between each one.
In contrast, full-sized kale plants fare better when spaced at least two per square foot, also maintaining around 12 inches of distance to allow for proper growth.
Caring for Your Kale Plants
Watering
When cultivating kale, it’s essential to maintain consistent moisture levels. While some varieties exhibit greater drought tolerance than others, most kale plants still require regular watering. In my experience, planting in full sun can lead to rapid topsoil drying, making it crucial to implement water-saving techniques. One effective method is to mulch around the base of the plant, helping to retain precious moisture. To ensure optimal growth, aim to provide approximately 1-1.
5 inches of water per week, taking into account the specific needs of your kale variety and local climate.
Temperature
Kale’s adaptability sets it apart from many other vegetables, thriving in a wide range of temperatures. Its ability to flourish in diverse climates has earned it a special place in the hearts – and gardens – of people around the globe. While hot weather won’t prompt kale to bolt, nor will cooler conditions cause it to wilt, the ideal temperature for growth is indeed on the cooler side.
In fact, seeds may take longer to germinate in warm soil, making cooler temperatures the perfect catalyst for their development.
Fertilizing
When cultivating kale, it’s essential to provide the right nutrients for optimal growth and health. A balanced fertilizer application is recommended after the initial harvest of leaves, assuming your soil lacks essential nutrients. In contrast, young seedlings benefit from a boost of high-nitrogen fertilizer to promote healthy development. Additionally, incorporating manure compost into your growing routine can further enhance kale’s overall well-being.
Pruning
Harvesting your plant is a natural way of pruning, as you’re removing the matured parts that are ready for consumption. This approach eliminates the need for traditional pruning methods. However, it’s essential to keep in mind that if you find the outer leaves turning yellow before you can harvest them, make sure to remove them promptly to prevent pests from being attracted to the decaying matter.
By doing so, you’ll not only maintain a healthy plant but also minimize the risk of unwanted pest activity.
Weeding
To minimize the task of weeding while cultivating kale, it’s essential to maintain sufficient space between plants. This simple technique can significantly reduce the number of unwanted interlopers that might compete with your greens for resources. Additionally, incorporating a layer of organic mulch into your garden beds can also serve as an effective deterrent against weeds, allowing you to focus on nurturing your healthy kale plants rather than constantly removing unwanted visitors.
Crop rotation
When cultivating kale, it’s essential to consider its botanical family – the brassicas – to avoid potential pitfalls. A crucial aspect of kale cultivation is planning for crop rotation and soil management. To simplify this process, I adopt a cluster planting strategy for all brassica varieties. This approach enables me to more effectively manage pests and implement efficient crop rotation schemes.
Succession planting
Kale’s rapid growth rate makes it an ideal candidate for succession planting. By spacing out your plantings, you can enjoy a constant supply of fresh greens throughout the season. One of the best things about kale is its ability to continue producing if trimmed regularly – a boon for gardeners with limited space. In fact, you can get away without planning multiple succession plantings, thanks to kale’s prolific nature.
That being said, I’m a big fan of kale and typically grow around 10 plants each year, which provides my husband and me with ample greens (although he’s not exactly thrilled about the idea!). Like spinach, kale is notorious for shrinking significantly when cooked, so be sure to factor this in when planning your harvest. Despite this peculiarity, I find that a few dozen kale plants are more than enough to keep us in leafy goodness all season long.
Kale Pests & Diseases
In most cases, growing kale proves to be a seamless process. However, it’s essential to be aware of some potential hiccups that may arise. As long as pest control measures are in place, cultivating this nutritious leafy green can be a truly enjoyable experience.
Cabbage Looper
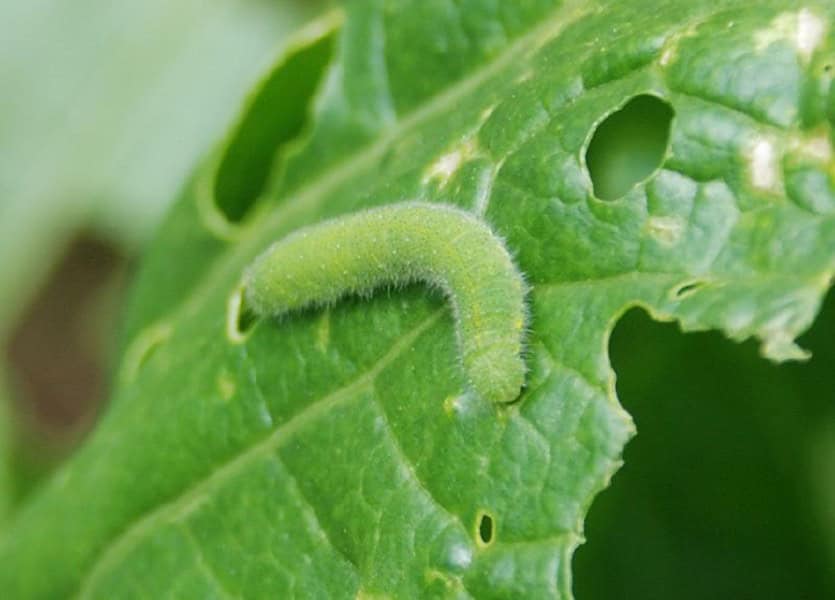
The cabbage looper, also known as the cabbage moth or inch-worm, is a relentless cole crop pest that has been causing trouble in my garden since my second year. Each spring, I’m faced with the unpredictability of damage, making it challenging to prepare for an infestation. Once my seedlings are transplanted outdoors, pests like the cabbage looper seem to appear out of nowhere, requiring me to take action.
While hand-picking and drowning them in soapy water is a simple solution, it may not be sufficient if you have multiple plants affected. This year, I’ve decided to take a proactive approach by investing in pest covers to prevent infestations. Another strategy is to plant kale near herbs like parsley, dill, and fennel, which can help deter the worms. Additionally, Trichogramma wasps are natural predators that can be effective in controlling the population.
If all else fails, botanical insecticides like spinosad and BTK sprays can be used as a last resort.
Beet armyworm
In tropical and subtropical regions, this pest species is particularly prevalent. Its larval stage is notorious for its voracious appetite, consuming foliage and even burrowing into plant buds. While chemical controls like insecticides can be effective in eliminating them, a more organic approach involves manual removal and washing plants with soapy water to maintain population levels.
Large Cabbage White and Diamondback Moth
When it comes to brassicas, pests like the large cabbage white and diamondback moth can be significant threats. These unwanted visitors can cause substantial harm if left unchecked. A proactive approach is essential in protecting your kale from these invaders. This includes crop rotation strategies and cultivating trap crops, such as collards and mustard, which can help deter these pests.
Cutworms
Early in the growing season, cutworms begin to emerge, targeting young leaves and feeding at the base of plants. This voracious behavior can quickly decimate an entire plant. To effectively manage these pests, consider hand-picking the bugs off your plants or encircling them with diatomaceous earth. For a more preventative approach, thoroughly till your garden in the fall to disrupt cutworm populations and prevent infestations from taking hold.
Cabbage Aphid
These tiny, gray-green pests are commonly referred to as plant lice. Typically, they can be found clustered on plants during the fall season. To effectively manage an infestation, it’s essential to remove any affected leaves by clipping them off. Additionally, treating the plant with insecticidal soap can help eliminate the problem.
Flea Beetles
To combat flea beetle damage on kale, consider spraying the affected areas with a solution made from three parts water, two parts rubbing alcohol, and one part mild dish soap. This mixture is effective at repelling the pests without causing harm to the plant’s delicate foliage. Alternatively, you can also try dusting your kale plants with talcum powder to create an inhospitable environment for flea beetles.
Both of these methods are simple yet effective ways to protect your kale from these pesky insects.
Thrips
To effectively control thrips, consider implementing a two-pronged approach that combines physical barriers with biological control methods. Start by strategically positioning sticky traps around your plants to capture and remove any adult thrips present in the area. This simple yet effective method can help reduce the overall population of these pests. Additionally, make sure to maintain a healthy ecosystem by attracting beneficial predators such as ladybugs or lacewings that feed on thrips.
By providing an environment conducive to their survival and activity, you can encourage these natural pest control agents to work in your favor, further reducing the impact of thrip infestations.
Root-knot Nematode
A particular type of pest inserts its parasitic body into plant roots, proceeding to lay eggs within. To prevent this unwanted visitor from causing problems, it’s essential to implement a crop rotation strategy and cultivate resistant plant varieties.
Downy Mildew
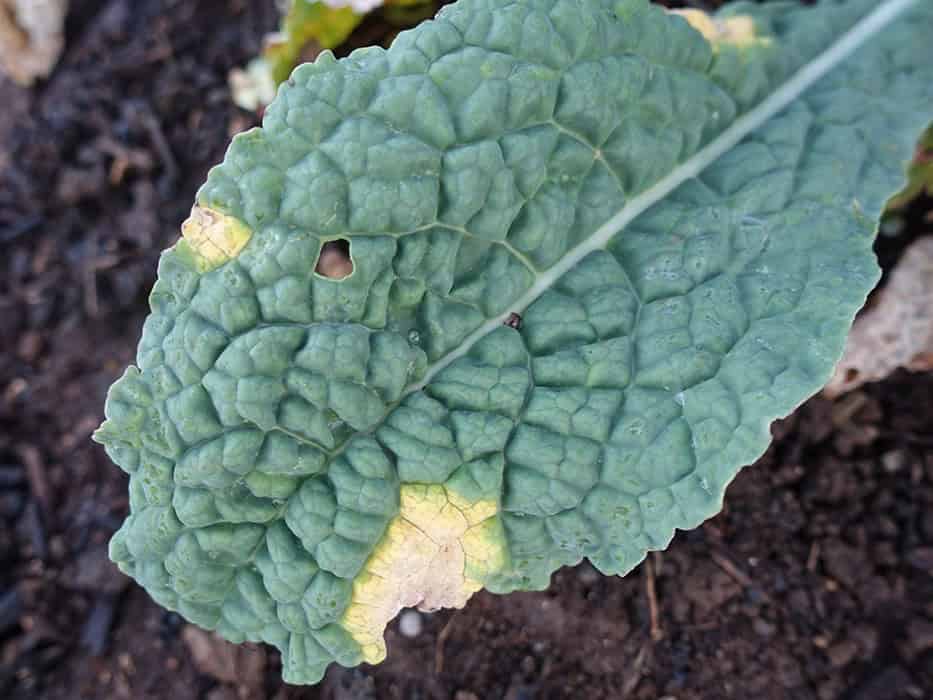
The culprit behind downy mildew is a type of fungus that’s closely related to algae. This pesky condition manifests itself as white or yellow patches with a fluffy coating on the underside of leaves. To prevent downy mildew from taking hold, make sure your plants have enough space to grow and avoid watering them directly overhead. If the problem does arise, copper-based sprays can be an effective way to eliminate the issue.
Anthracnose
In regions characterized by frequent rainfall, the presence of anthracnose – a fungal disease – poses a significant threat to kale crops. This pathogen is highly contagious and can quickly spread throughout an infested area if left unchecked. To effectively manage the spread of anthracnose, it’s crucial to remove any infected plants from the soil and adopt irrigation practices that avoid overhead watering.
Alternaria Leaf Spot
Kale, like other brassicas, is prone to Alternaria leaf spot, a common fungal disease that can significantly impact crop yields. To combat this issue, applying fungicides can be an effective solution. However, prevention is often the best medicine, and implementing proper gardening practices such as rotating crops, mulching, and maintaining adequate plant spacing can help minimize the risk of infection. By taking these proactive steps, gardeners can enjoy a healthy and thriving kale crop.
Damping-Off
To minimize the risk of seedling damping-off, it’s essential to take a few crucial steps from the outset. First, thoroughly sterilize all pots, tools, and trays with bleach solution to eliminate any potential pathogens. Additionally, refrain from reusing potting mix and opt for fresh supplies each time you sow seeds. Furthermore, use clean water when watering your seedlings to prevent the spread of fungal diseases.
Finally, exercise patience and wait until outdoor soil has reached a suitable temperature before transplanting your young plants.
Black Rot
The insidious black rot fungus poses a threat to various plant species. Its telltale sign is the formation of V-shaped lesions on leaf margins. To mitigate this issue, it’s essential to implement good rotation practices and avoid overhead watering. A simple yet effective approach is to water your plants in the morning, allowing leaves to dry out before the sun sets, thereby reducing the risk of fungal growth.
Companion Planting for Kale
Best Companion Plants
When it comes to growing kale, there are certain plants that can help keep pests at bay. For instance, pairing kale with dill, fennel, coriander, parsley, and sweet alyssum has been shown to effectively control the cabbage looper.
Additionally, kale tends to get along swimmingly with many other vegetables and herbs, including potatoes, beets, lettuce, chard, peas, garlic, onion, leeks, radishes, spinach, celery, cucumber, artichoke, as well as a variety of herbs like sage, thyme, mustard – making it an excellent addition to any garden.
Worst Companion Plants
Harvesting and Storing Kale
Harvesting kale is a straightforward process that requires minimal equipment: simply grab some scissors or a sharp knife and a bowl or bucket to collect the freshly cut leaves. With this simple setup, you’ll be enjoying your homegrown kale in no time.
When it comes to harvesting, start by picking off the outermost leaves first.
This allows the inner core of the plant to continue growing and producing new leaves, making kale a ‘cut-and-come-again’ crop that can be harvested multiple times from each individual plant.
Timing is everything when it comes to harvesting kale. For full-size leaves, wait until they reach around 8 inches in length. If you’re looking for baby greens, however, you can harvest the leaves at a smaller size.
Kale typically takes about 50 days to mature, making it a relatively quick crop to grow. Once you’ve harvested your kale, wash it immediately and store it in the fridge in leftover plastic grocery bags or containers to help retain moisture and keep the leaves fresh for up to two weeks. Alternatively, some gardeners prefer to dry their kale leaves before storing them – feel free to experiment and find the method that works best for you.
Recipes
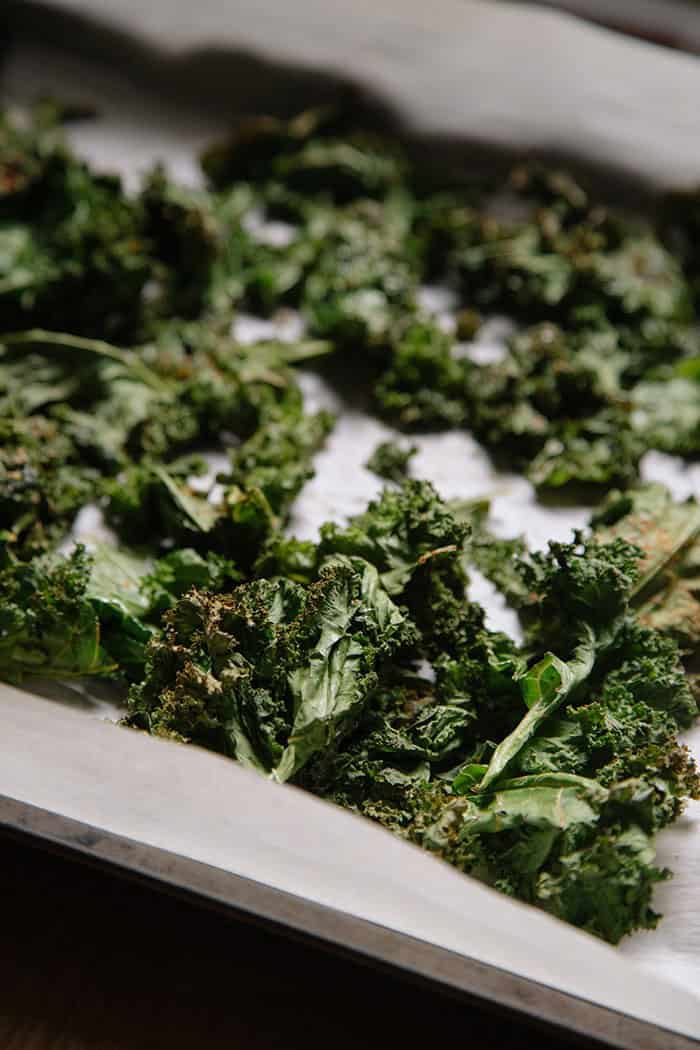
Kale is a versatile superfood that can be savored both raw and cooked. When added to salad dressing, paired with cheese or nuts, and complemented by a protein source, it becomes a satisfying meal on its own. For a more indulgent treat, baking kale leaves in the oven brings out their natural sweetness. Simply toss them with olive oil, season with salt, pepper, and garlic powder, and roast at 350°F until crispy. As for growing kale, I’m a huge enthusiast!
With numerous varieties to explore, each year presents an opportunity to discover new flavors and textures. It’s become a fun annual tradition to seek out a fresh type to cultivate and enjoy.
