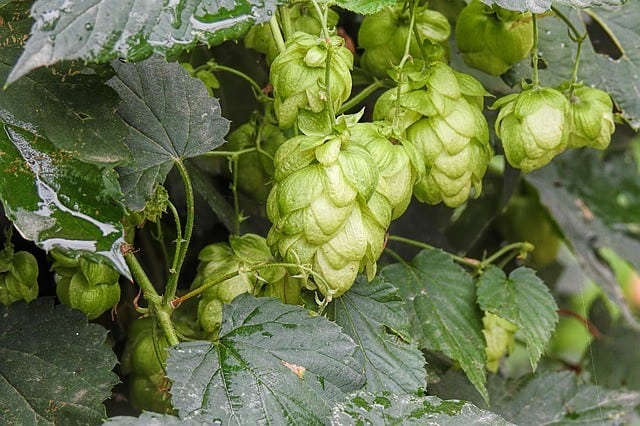
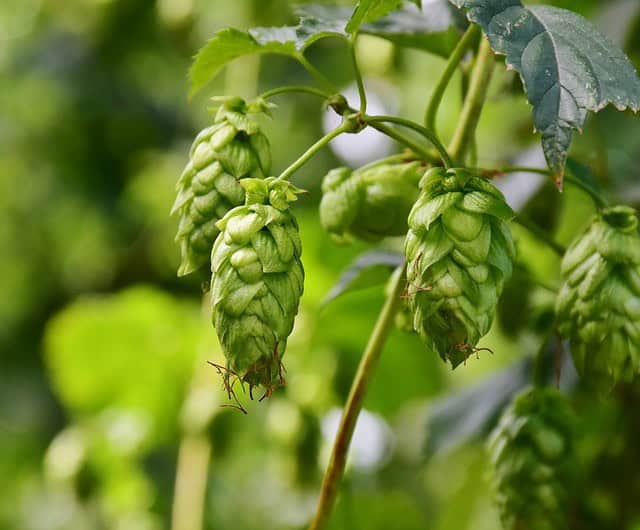
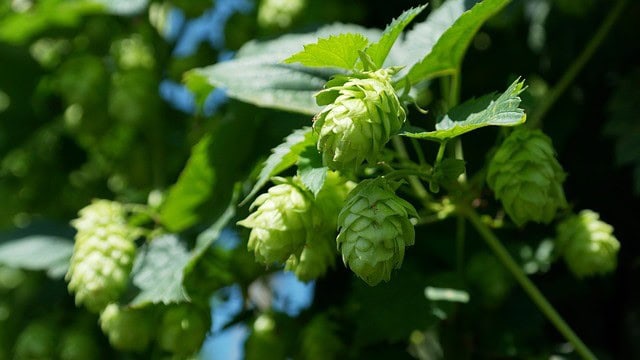
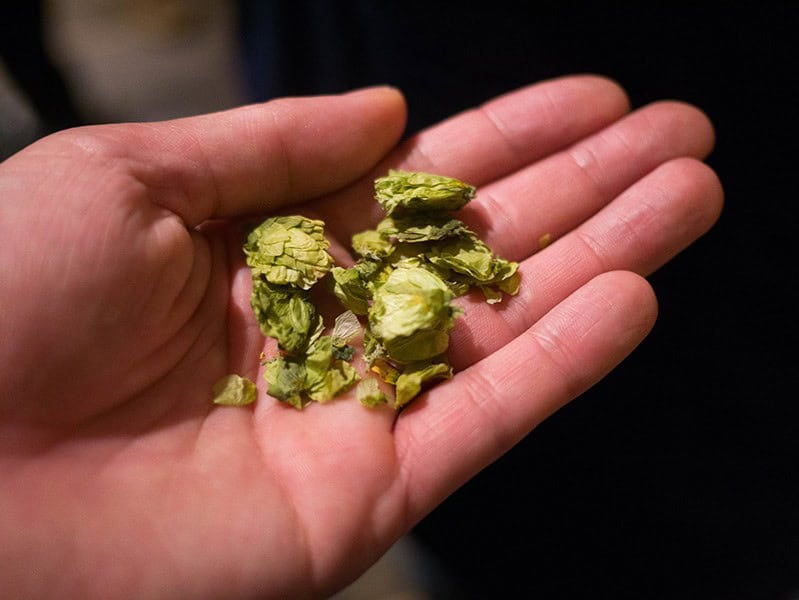
If you’re a beer enthusiast, growing your own hops can be a game-changer. Not only will you have the ability to brew unique flavor profiles, but you’ll also save money by using locally sourced ingredients. And if brewing isn’t your thing, you can sell your harvest to local breweries or at farmers’ markets. The female flowers of the Humulus lupulus vine are what give beer its distinctive taste and aroma, as well as natural preservative properties.
But hops aren’t just for beer – they have a range of uses beyond the brew. As a calming medicinal remedy, they’ve been used for centuries to soothe nerves. And if you’re feeling adventurous, you can add them to salads, use them in place of basil, or sprinkle chopped leaves on fries for an added burst of flavor.
The Best Hops Varieties
As the craft brewing industry continues to thrive, hop growers have identified a core selection of tried-and-true varieties that consistently deliver. These classic hops may not be as trendy as some newer options, but they remain staples for brewers seeking reliable flavor profiles and performance. Among these stalwarts are Cascade, Chinook, Centennial, Crystal, Nugget, Fuggle, Willamette, Magnum, Hallertauer, and Golding.
Each of these varieties brings its own unique characteristics to the table, whether it’s citrusy notes from Cascade or spicy undertones from Chinook. Some, like Crystal, offer a woody aroma that pairs well with specific beer styles, while others, such as Willamette, provide floral and elderberry notes that add depth and complexity.
Despite the ever-growing list of hop varieties, these classics remain popular choices among brewers due to their reliability, consistency, and ability to deliver on flavor and performance. When selecting the right hops for your brews, consider factors like climate, desired flavor profile, and yield. With over 120 hop varieties to choose from, it’s easy to get overwhelmed. But by asking yourself these key questions – What varieties grow best in my location?
What flavors or characteristics do I want in my beer? Do I have the desired yield? – you’ll be well on your way to selecting the perfect hops for your brews.
A Note on Alpha Acids
When selecting a hop variety for brewing, one crucial factor to consider is the alpha acid content. This measurement directly impacts the bitterness of your beer. In essence, a higher alpha acid percentage translates to a more pronounced bitterness in the final product. This knowledge will help you make informed decisions when choosing the perfect hops for your brew.
How to Grow Hops
While hop plants (Humulus lupulus) exhibit a unique characteristic, being dioecious, they consist of separate male and female individuals. The female plant, specifically, is responsible for producing the flowers used in beer brewing, whereas their male counterparts serve as the pollinators. As hardy perennials, hops require an abundance of sunlight and ample space to flourish.
Growing Zones
While hops can thrive in a wide range of USDA hardiness zones (3-8), their ideal growth locations lie between 35 and 55 degrees latitude. However, with proper care, you can successfully cultivate hops in almost any region. It’s essential to note that hops are sensitive to day length, which means they tend to struggle in areas with extreme latitudes.
This is because the plants require a specific photoperiod to grow optimally, making it crucial to choose a location that falls within their preferred range.
Sun Requirements
When selecting a location for your hop plants, look for an area that basks in full sun with 6 to 8 hours of direct sunlight each day. Ideally, choose a spot that receives the most intense sunlight during late morning and early afternoon hours, as this period tends to be less harsh. Additionally, having some shade in the late afternoon can be beneficial.
It’s worth noting that mature hops are capable of withstanding frost, so you won’t need to worry about protecting your plants from cold temperatures.
Soil Requirements
For optimal hop growth, you’ll need soil that’s rich, well-draining, and packed with nutrient-rich organic matter. Unfortunately, clay soil can be challenging for hops, so it’s essential to address drainage issues before planting. One way to do this is by incorporating compost and aged manure into the earth. If your soil is heavy on clay, straw and sand can also help improve its structure. Alternatively, you could try planting in mounds or raised beds.
In terms of pH, aim for a level between 6 and 7.5 for optimal growth.
How to Start Hops
When it comes to growing hops, you have two main options: using rhizomes or crowns. Rhizomes are segments of root from female plants, while crowns refer to entire mature plants. If you opt for rhizomes, you can expect a larger selection to arrive in the fall, with shipments typically starting early in the spring. For optimal storage, keep these rhizomes in a cool, dark place until you’re ready to plant them. Alternatively, you can also find spring-ship options if that suits your schedule better.
Supporting Plants
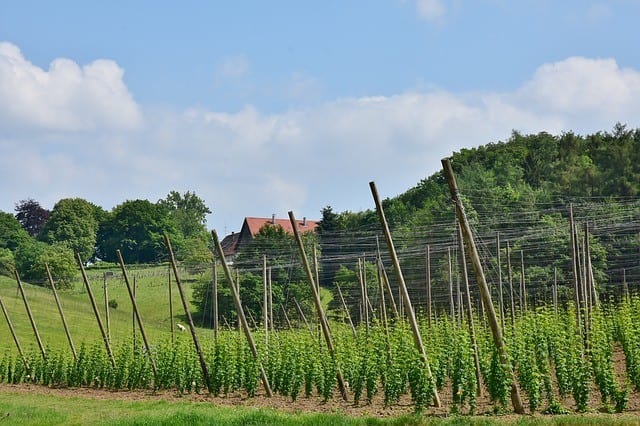
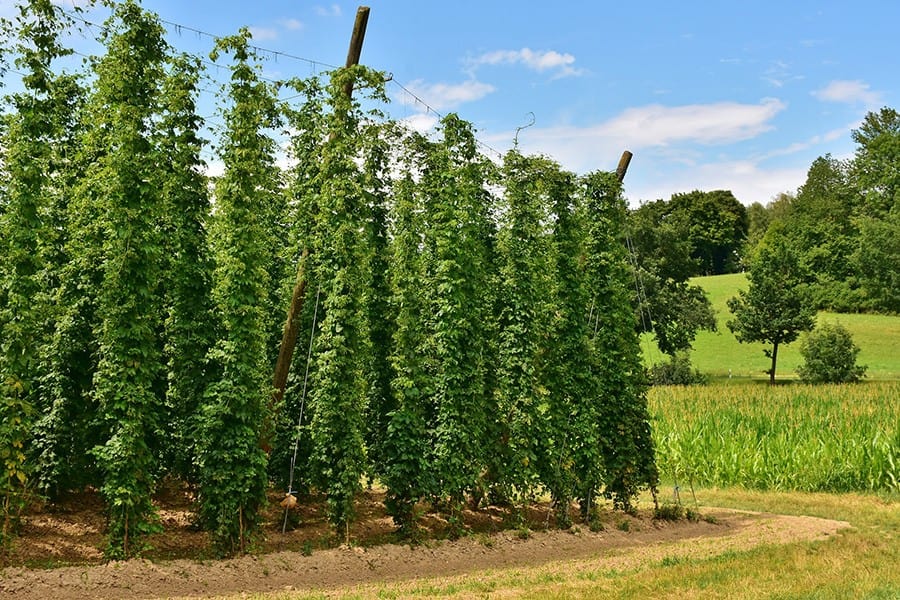
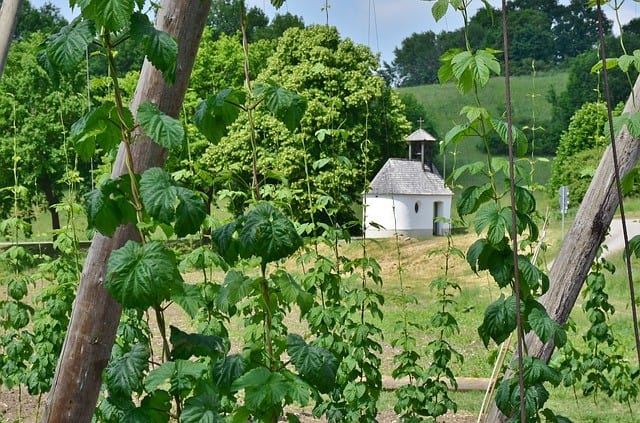
To thrive, hops require a supportive framework, such as a pole or trellis, allowing them to grow upwards in a helical pattern. This unique characteristic sets them apart from vines, which use tendrils and suckers to climb. As the plants can spread out extensively, it’s essential to provide ample space for them to flourish. In fact, hops can quickly cover a 20-foot vertical trellis, showcasing their impressive growth potential.
Interestingly, while the above-ground foliage may die back each winter, the roots remain alive and will sprout new growth when spring arrives.
Planting Hops Outside
When cultivating hops, it’s essential to provide them with a growing season of at least 120 days. Timing is crucial, as you’ll want to transplant your hops outside after the last frost has passed and the soil has warmed up – this typically occurs between February and April, depending on your location. While dormant roots can withstand temperatures as low as -20℉, newer plants are more susceptible to frost damage.
To plant your rhizomes, place them horizontally in the soil, ensuring any buds are oriented upwards and roots downwards. Cover with a thin layer of soil, gently pack it down, and then lightly water the area.
For crowns, dig a hole and position the crown within it. Gently mound the dirt around it, packing it down to secure in place, and finally, add a gentle watering.
Starting Hops Indoors
When cultivating hop plants, it’s essential to consider your local climate and growing conditions. If you live in an area with a shorter growing season, you can start hops indoors about 6-8 weeks prior to the last predicted frost date. However, before moving them outside, make sure to acclimate the plants to outdoor conditions by gradually exposing them to natural light and temperature fluctuations over the course of one week.
This process, known as hardening off, is crucial for ensuring a successful transition from indoor cultivation to outdoor growth.
Spacing
When planting rhizomes, create a layout that allows for optimal growth and drainage. Space the rhizomes in rows about 2-3 feet apart, with 3-5 feet separating each row. To ensure proper drainage, mound the soil around each rhizome to a height of approximately one foot, allowing excess water to escape.
Growing Hops in Containers
While growing hops in containers can be a bit more challenging than in the ground, it’s not impossible. However, you’ll need to consider the limitations that come with this method. The root system will be confined, and drainage may become an issue due to the container’s design. This might result in a slightly reduced yield compared to growing hops in their natural habitat. On the other hand, containers can provide a unique opportunity to showcase your hops as a lovely patio feature.
To increase your chances of success when planting hops in containers, choose a high-quality potting mix with added compost for improved drainage. Make sure the container is at least 20 inches in diameter to give the roots enough room to spread and grow. This will help mitigate some of the challenges associated with growing hops in a contained environment.
How to Care for Hops
Watering
To keep hops thriving, it’s essential to provide them with ample water supply, particularly as they grow. A drip irrigation system proves highly effective in this regard, allowing for targeted watering at the root level and subsequently minimizing disease transmission. As plants mature, they typically require around 1.5 inches of water per week, making regular monitoring crucial to ensure optimal growth.
Fertilizing
Before starting the process of planting, take some time to prepare the soil by incorporating an all-purpose fertilizer at a depth of 6 to 8 inches. Additionally, consider side-dressing the plants with well-composted manure as the growing season progresses, providing them with the necessary nutrients for optimal growth.
Training
As summer’s warmth sets in during June and early July, hop enthusiasts must embark on a crucial training process. When shoots reach 1-2 feet in length, it’s essential to begin this process using sturdy bailing twine. Start by stretching a cord 10-15 feet across the row of plants, then bring the twine down to each individual plant. Secure the twine with a sturdy stake at the base of the plant, allowing the hops to naturally grow up and around the line as you gently twist the plant in place.
Mulching
When cultivating hops, it’s essential to maintain a weed-free environment. To achieve this, apply a thick layer of well-rotted organic mulch around the plants in early spring, just before the primary growing season kicks off. This will help suppress any encroaching weeds from gaining a foothold. Make sure to spread 1-2 inches of mulch evenly around each plant, taking care to clearly mark your varieties to avoid confusion later on.
Pruning
When cultivating hops, it’s essential to contain their sprawling nature through strategic pruning. This will encourage the plants to thrive within a specific area. Keep in mind that hops are known to produce fruit for an extended period of time, typically several years before needing to be replaced with younger vines.
Common Hops Pests and Diseases
Downy Mildew
Downy mildew, caused by Pseudoperonospora humuli, can wreak havoc on plants with its characteristic symptoms: brittle, stunted growth and a failure to climb upwards due to the fungus’s inhibiting effect on cone development, ultimately turning them brown. The best course of action is to eliminate infected plants through removal and burning, as well as utilizing sulfur-based fungicides for effective treatment.
Powdery Mildew
In the Pacific Northwest, powdery mildew poses a significant challenge for plant growers. The condition is characterized by the appearance of white spots on leaves, buds, and cones, with infected cones taking on a reddish-brown hue as they begin to decline. At its root, powdery mildew is often linked to inadequate air circulation, which can be alleviated through strategic pruning or thinning of plants to facilitate better airflow.
Unfortunately, there is no known cure for the condition, and affected plants must be thoroughly removed and destroyed to prevent the spread of the disease.
Hop Stunt Viroid
Hop stunt viroid, a notorious plant pathogen, can cause devastating effects on plant growth, resulting in a significant reduction of up to 80% in yield. Its insidious nature means that the infection may not be noticeable until after three or five growing seasons, increasing the risk of spreading the disease. To prevent this, it’s crucial to source hop stocks that are certified free of this pathogen and promptly remove any infected plants from your garden.
Additionally, ensuring the sterilization of tools between use is a vital measure in preventing the spread of the infection.
Hop Aphid
Hop aphids are notorious for their destructive behavior, feeding on developing cones and causing them to turn a disconcerting shade of brown. However, their impact doesn’t stop there. They also produce massive amounts of a sticky substance that attracts fungi to the leaves and cones, creating an ideal environment for disease transmission. In fact, these pesky insects can transmit diseases from one plant to another, putting your entire garden at risk.
To combat this issue, consider introducing ladybugs to your garden, which are natural predators of aphids. Alternatively, you can try using insecticidal soaps or neem oil to keep them under control.
Black Root Rot
Black root rot is notorious for its ability to persist in soil for extended periods of time. Its survival relies on excessively moist conditions, making it essential to identify and rectify any areas in your garden where water tends to pool or collect. The presence of this disease can be confirmed by observing wilted and faded vines, accompanied by rotted roots with a distinctive black coloration.
White Mold
White mold, also referred to as Sclerotinia wilt, is characterized by the appearance of lesions on the stem below the soil line that eventually develop a white fungus. To prevent this issue, it’s essential to maintain good air circulation around your plants. This can be achieved by spacing them out effectively. Additionally, watering in the morning allows plants to dry out before evening, reducing the risk of moisture accumulation and subsequent fungal growth.
Verticillium Wilt
When yellowing leaves on your plant start from the base and progress upwards, it may be an indication of verticillium wilt. A closer examination typically reveals a striped pattern or discoloration of the woody tissue under the bark, confirming the diagnosis. To prevent the onset of this disease, consider using resistant varieties such as Bullion or Brewers Gold.
Additionally, maintaining a well-weeded garden, avoiding excessive nitrogen fertilization, and refraining from over-irrigation are all crucial measures to reduce the risk of verticillium wilt.
Mosaic Virus
While a cure for mosaic virus is currently unavailable, there are measures you can take to minimize the risk of infection. One key step is to maintain control over aphid populations and sanitize any equipment that comes into contact with your plants. Additionally, purchasing certified virus-free stock is also an effective way to prevent the spread of mosaic virus.
To identify if your plants have already been infected, keep an eye out for distinctive yellowing patterns on leaves, which will eventually turn necrotic. Early detection is crucial in preventing the further spread of the virus and mitigating its impact.
Japanese Beetle
When Japanese beetles are spotted on your plants, prompt action is crucial to prevent a full-blown infestation. Female beetles attract more males rapidly, making it essential to intervene swiftly. Effective methods include pheromone traps and trap plants like grapes and rose of Sharon. Organic growers can employ Impede or Trilogy sprays, whereas conventional growers may opt for Sevin, Nuprid, or Brigade.
Additionally, sprinkling diatomaceous earth around the plants provides an added barrier against these pesky pests.
California Prionus
This beetle’s larval stage is particularly notorious for its impact on hop root systems. Capable of girdling plants and ultimately destroying them, these young insects can also induce a range of detrimental effects, including yellowing leaves and wilting – even if they don’t prove fatal to your plants. Meanwhile, the adult beetles are distinguished by their striking horn-like antennae, which often take on a saw-like appearance.
These beetles typically emerge during the summer months, while the larvae themselves can spend up to five years beneath the soil surface, slowly nibbling away at roots. In order to manage infestations, insecticides may be employed as a means of control.
Potato Leahopper
A common issue in hop cultivation is the presence of potato leafhoppers, which can cause yellowing on the margins of hop leaves that eventually leads to curling and death. These pests feed by sucking plant juices and blocking nutrient channels with a toxin. To detect this pest, regularly inspect the underside of your hop leaves.
While pesticides are available for controlling potato leafhoppers, it’s essential to use products specifically formulated for these insects to ensure effective management.
Spider Mites
The two-spotted spider mite’s destructive effects on hop plants are evident in its method of feeding, where it extracts juices from leaves and cones. Initial signs of infestation often manifest as the webbing produced by these arachnids before the tiny pests themselves become visible. In severe cases, mites can completely defoliate a plant, also reducing the alpha acid content in hop cones.
To effectively manage this issue, start by dislodging the mites with a strong jet of water and then apply a neem oil-based spray repeatedly to prevent re-infestation.
Companion Plants for Hops
When it comes to companion planting, hops are surprisingly versatile and can thrive alongside a range of other plants. In fact, there are several species that pair particularly well with hops, including yarrow, chives, anise, corn, coriander, and grapes. The rose of Sharon is also a great match for hops. On the flip side, it’s worth noting that certain plants can have a negative impact on hops, so it’s best to avoid planting them near potatoes, beans, peas, or tomatoes.
Harvesting and Storing Hops
Growing hops demands dedication, as it takes around three years for plants to reach full production. The initial yield is relatively low, around 10%, but by the third year, you can expect a 100% harvest. Timing-wise, most hops harvesting occurs between mid-August and mid-September, although this may vary depending on your region. When the cones start to feel papery and dry, it’s time to harvest.
You’ll know they’re ready when they leave a yellow powder on your fingers, release a fragrance upon squeezing, and spring back into shape. The lower bracts of the cone will also turn brown, typically 13-16 weeks after planting. Harvesting can be done by cutting the bines or hand-picking the cones. Post-harvest, it’s essential to dry the hop cones before storing them to prevent spoilage.
A common method is air-drying, where you spread the cones out in a single layer on a window screen, away from direct sunlight. Turn the cones daily for even drying. Alternatively, you can use a dehydrator or oven set at around 140°F until the hop flowers are dry. To maximize the shelf life of your harvest, store hops properly, shielding them from moisture, air, and heat.
You can keep them in the refrigerator or freezer in a vacuum-sealed bag, where they can last up to two years if dried and stored correctly.
Other Uses for Hops
While it’s tempting to simply discard excess hop cones, there are numerous creative and practical ways to utilize them. Consider transforming them into delectable treats, such as macarons or hot wings, which not only showcases their culinary potential but also reduces waste. Alternatively, you can derive hop extract, a valuable resource that may be employed to alleviate symptoms associated with menopause, insomnia, and sleep disorders caused by shift work.
For brewers and gardeners alike, cultivating hops at home presents a unique set of challenges and rewards. Although it demands careful planning and labor, the satisfaction of producing locally sourced hops and infusing them into beer is a truly rewarding experience that enhances the overall brewing process.
