As I transitioned from my initial small garden to a sprawling 2.5-acre property surrounded by forest and mountain slopes, I recognized the importance of scaling up my design elements to harmonize with the expanded landscape. In contrast to my original two-seater bistro dining set nestled in my herb area, our current setup features a 14-person outdoor dining table, carefully positioned to anchor the space.
To further enhance the ambiance, we incorporated a cob pizza oven and an expansive outdoor living room, centered around a chimney, which serves as a focal point and invites relaxation.
Small Bistro Dining Area – Even Large Landscapes Need Them
While I cherish my spacious entertaining area, I often find myself longing for a peaceful retreat where I can unwind with a good cup of tea and reflect on life’s simple joys. A tiny table that seats just two people has a way of making any moment feel more intimate, and it’s this very concept that inspired me to carve out a serene nook in my own potager-style vegetable garden (which is currently under development).
If you’re looking to create your own charming sanctuary amidst the beauty of nature, I invite you to join me on this journey as I share the process of bringing this little slice of heaven to life.
Get Inspired
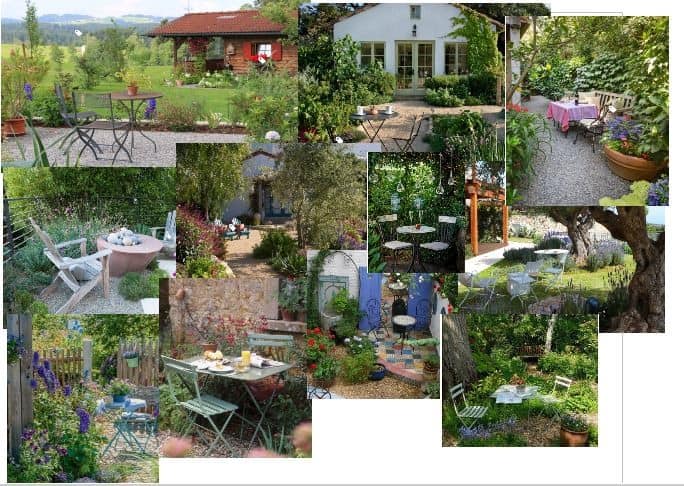
To kick-start my design plan, I turn to creative inspiration. For this project, I embarked on an internet scavenger hunt, collecting images of garden bistro dining area ideas that caught my eye. Houzz, listicles, and Pinterest were my go-to resources, and I bookmarked the ones that resonated with my aesthetic sensibilities.
Days later, I revisited my saved images to gauge their continued appeal.
Those that still spoke to me, I analyzed further, identifying specific qualities that drew me in – was it a particular color palette, sense of enclosure, flower arrangement, or style of furniture?
My favorite inspiration images eventually found their way into a photo collage, which became my trusty reference point throughout the rest of the process. Having a visual reminder of what I’m aiming for keeps me motivated even when my project hits a roadblock.
Pick a Location
When kickstarting a design plan for an outdoor bistro, the first crucial step is identifying the perfect location. This site will influence various aspects of your design, including the type of furniture and shade considerations. For instance, if you reside in a region with scorching temperatures, you’ll need to choose a spot that provides adequate shade, especially during peak hours like high noon.
Alternatively, incorporate creative solutions for providing shade if natural shelter isn’t available.
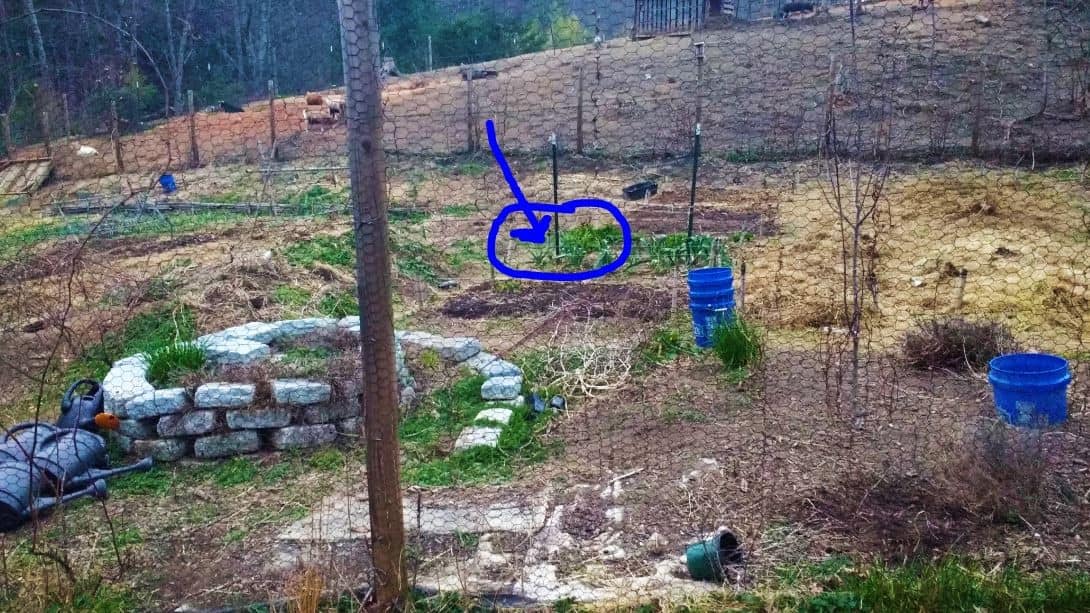
Inspiration is key when deciding on the ideal location for your bistro. I drew motivation from my treasured inspirational images, envisioning a cozy seating area nestled in the heart of my garden. Yet, I also aimed to create a seamless integration with the surrounding landscape, rather than merely plopping the table in the middle of the garden.
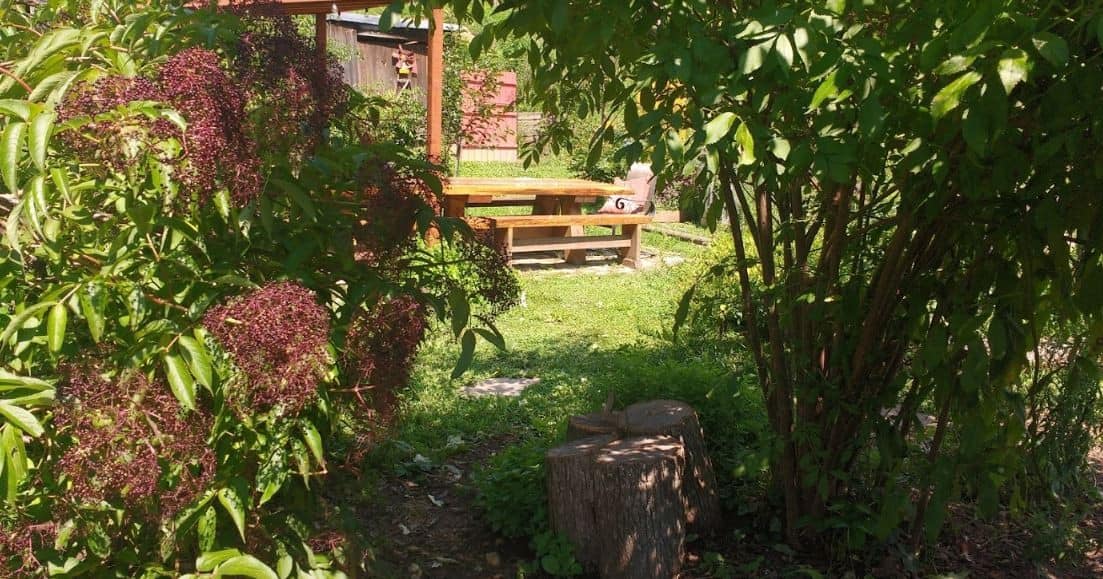
Images featuring charming houses and mature trees resonated deeply with me.
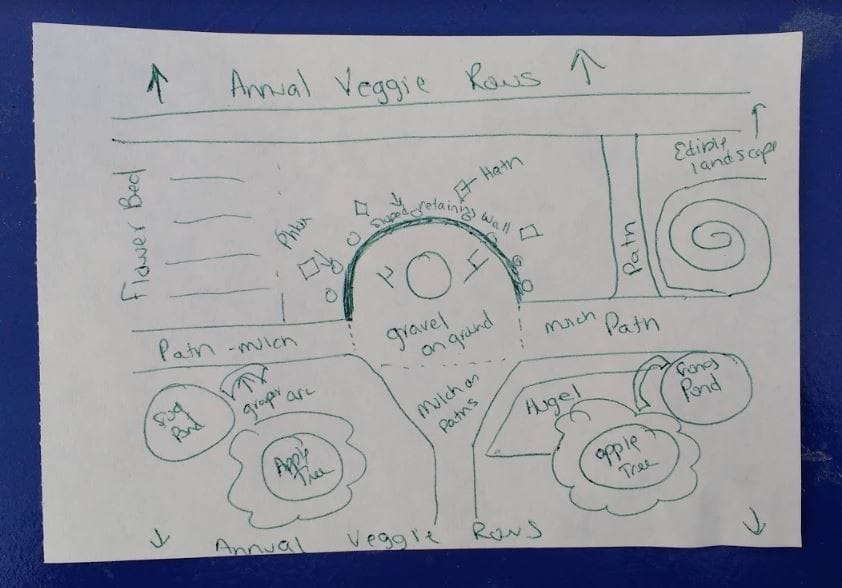
My personal connection to nature led me to anchor the seating area near my herb spiral at the garden’s entrance. This area boasts a unique combination of hugelkultur, fruit trees, grape arcs over miniature frog ponds – a harmonious blend that instills a sense of grounding and permanence in my design.
By narrowing down your preferred location, you’ll be well-prepared to start planning and bringing your outdoor bistro vision to life.
Make a Plan
When tackling a project like adding a 2-seater bistro table to a garden, it’s essential to strike the right balance between planning and improvisation. In my case, I had a grand vision for how to bring this space together, which involved jotting down notes and making quick sketches to keep me on track. To avoid common design pitfalls, such as creating a space that looks like it was plucked from a generic catalog, it’s crucial to integrate your design with the existing landscape.
This means going beyond surface-level aesthetics and taking the time to thoughtfully consider how each element will work together. By doing so, you can create a unique and intentional space that feels truly yours. In my experience, this integration is especially important when working with outdoor spaces like gardens.
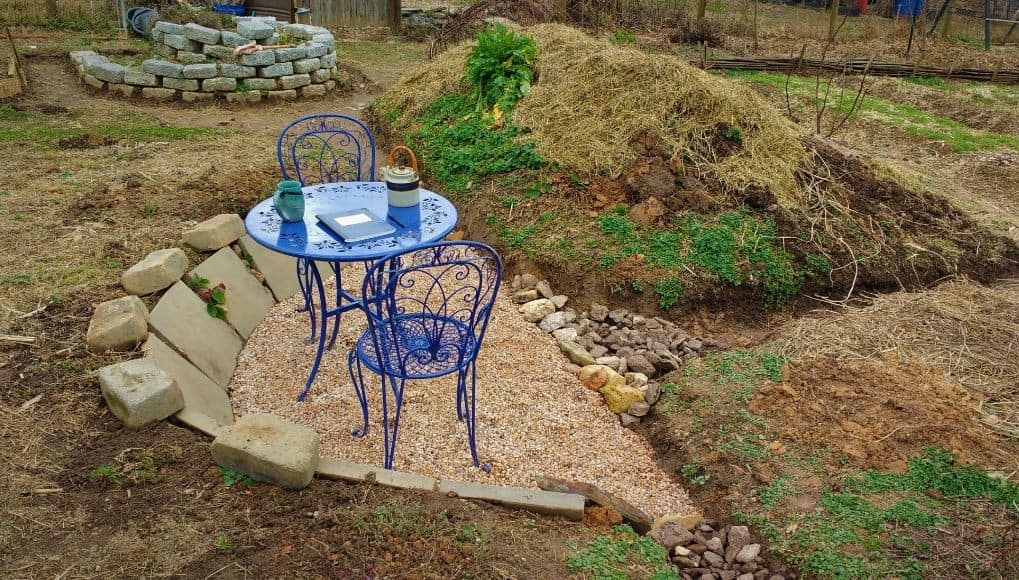
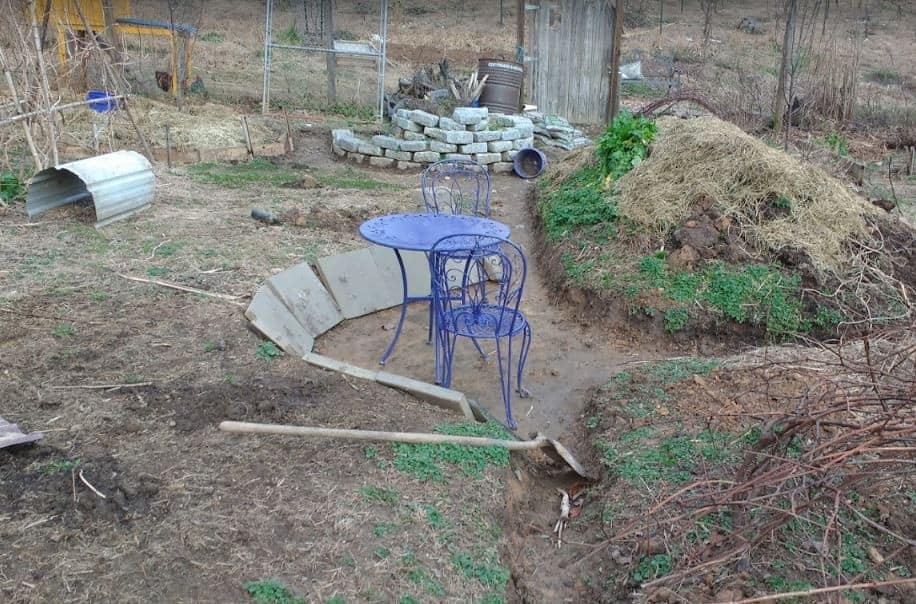
For example, I opted for a semi-circle seating area rather than a traditional rectangle, which allowed me to echo the shape of the herb spiral at the entrance to the area, thereby tying those two elements together. Additionally, recessing the seating area and adding a semi-retaining wall gave the space more presence and permanence, making it feel like a cohesive part of the larger landscape.
Decide on Materials
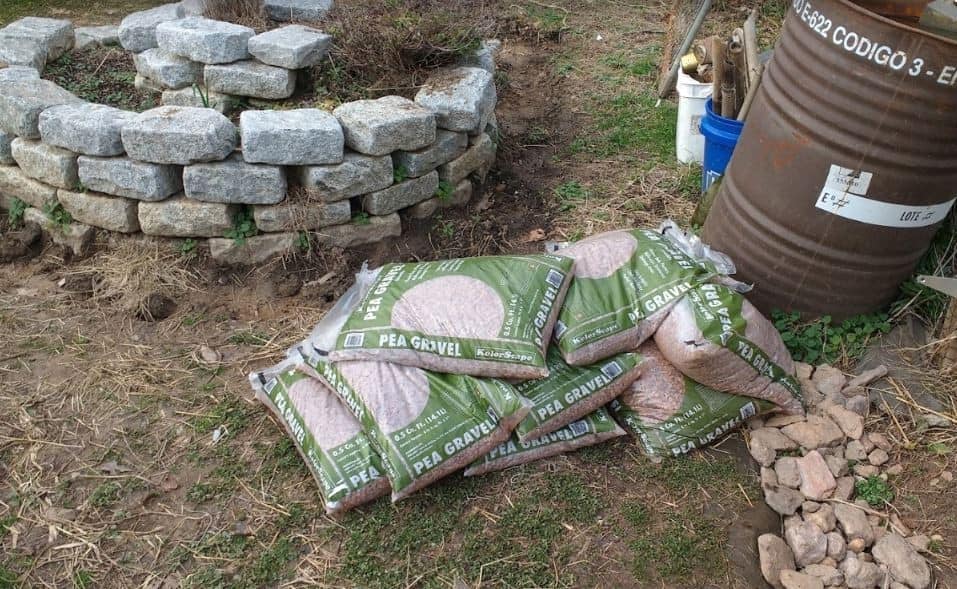
After establishing your basic design plan, it’s time to think about the materials you’ll need to bring your vision to life. For a 2-seater area, this typically includes a table and chairs, as well as any flooring or decorative details you’ve incorporated into your design. When it comes to the floor itself, drainage is a crucial consideration. To achieve this, I opted for a gentle slope that allows water to run off, supplemented by the use of pea gravel on the ground.
This not only promotes good drainage but also happens to be inexpensive and easy to install. The lighter color also helps to keep the area from becoming too hot. Other flooring options include flagstone, patio pavers, bricks, decking, and hardwood mulch – which I’ve used successfully in my own garden paths. To separate the pea gravel from the surrounding mulch, I installed some edging to prevent the materials from mingling.
Incorporating natural elements into your design can be a great way to add texture and visual interest. In my case, I decided to use a transition zone of larger foraged rocks between the pea gravel and the mulch – not only did this look attractive but it also saved me the cost of purchasing additional materials. To stabilize the soil behind the seating area, which was being recessed by about a foot, I created a slight slope on the edge of the bed.
This allowed me to lay down heavy concrete pavers that I already had on hand – their weight and angle provided some much-needed retaining capacity. It’s worth noting that this approach may not be suitable for all soil types; in areas with sandy soil, a more substantial retaining wall would likely be necessary. In addition to thinking about the floor and surrounding landscape, it’s also important to consider the plants you’ll be using to add color and texture to your design.
For my seating area, I decided to uproot some phlox, strawberry runners, and oregano from other parts of my garden and replant them around the retaining wall – this would help secure the topsoil in the long term and provide a pop of color come spring. Finally, I made sure to furnish my new seating area with pieces that fit my design aesthetic.
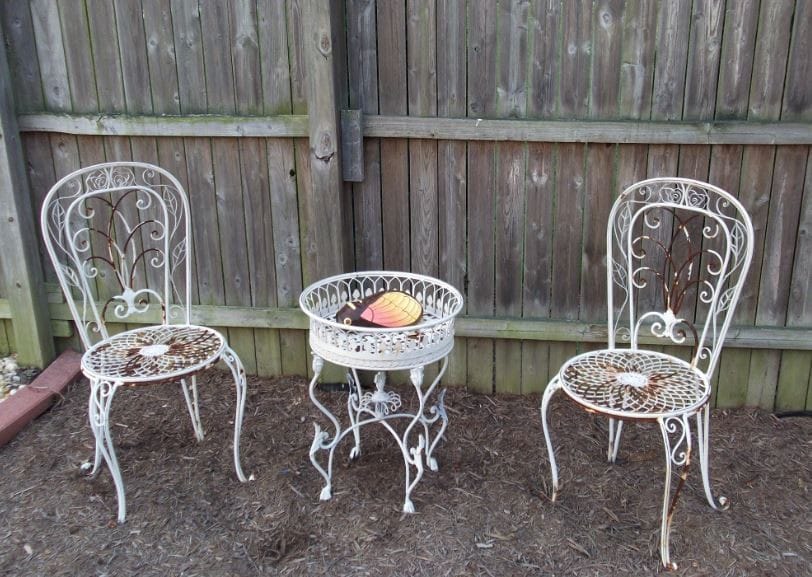
In this case, I already had a table and chairs on hand that I repainted in a rich, saturated blue – a color that tied in nicely with many of the inspirational images that had guided my design process. I also started scouring my property for other materials that could be used to bring my vision together.
Source your materials
Before commencing work on a small-scale project, I prefer to source my materials beforehand. This approach allows me to adjust plans if prices increase or desired materials become unavailable. Fortunately, for smaller projects, a reliable hardware store typically offers the necessary components. Additionally, repurposing leftover materials from previous endeavors can significantly reduce costs. Moreover, asking friends to donate their excess supplies can further contribute to cost savings.
When selecting materials, it’s essential to prioritize durability and longevity, as reworking the area repeatedly would undermine its intended purpose – creating a serene retreat that exudes relaxation.
Lay the Ground Work
It’s finally time to roll up your sleeves and put in the effort required to bring your vision to life. The first step is to clear the ground by following your carefully crafted plan. With a little elbow grease, you can transform your outdoor space in no time. In my case, the soil in my garden had been well-moistened by the abundant rainfall this year, making it a breeze to shape the area into its desired form.
In just a couple of hours, I was able to create the foundation for my new design, relocating some of the richer soil to other areas of my garden where it would be most beneficial.
Do a Reality Check
Before proceeding with the installation of my concrete pavers, I took a moment to verify the layout and adjust as necessary. This involved visualizing how I would use the space and making any required tweaks using my shovel. Once satisfied with the placement, I set up my furniture – chairs and table – to gauge the available room for movement. To ensure sufficient clearance, I experimented with sitting, standing, and moving around as if in regular use.
The next step was to confirm that the bed would retain its shape after a rainfall event. A good soaking rain provided the perfect opportunity to test this, and fortunately, the soil remained stable behind the pavers. Furthermore, the drainage functioned flawlessly, directing excess water down into the intended pathway. Had rain not been forthcoming, I would have employed my hose to replicate the scenario.
This proactive approach allowed me to address any potential drainage issues before laying my flooring material.
Pull It Off
The process of finishing up was relatively straightforward since I was working with a pea gravel floor. To prevent weeds from growing, I laid down some landscape fabric and positioned the pavers on the bed slope exactly where I wanted them. Next, I poured out the pea gravel to complete the area.
Before that, I had set down larger transition stones leading up to my mulched paths, replanted my base plants behind the retaining wall area, and added a few decorative details using extra retaining wall blocks from between my new plantings. Once done with the physical work, I set up my table and chairs in my newly created bistro dining area. Depending on your specific choice of materials, you may need to complete additional tasks.
Additionally, since I’m doing this in January, I’ll have to wait until spring arrives to assess whether my plant choices are effective.
Relax and Enjoy
Congratulations on completing the task! As you sit back and admire your newly designed bistro space, take a moment to unwind with a soothing cup of tea. You’ve truly earned this break after all the hard work that went into bringing your vision to life.
