As I began homesteading, I started with a small footprint – roughly ¼ of an acre. I divided this space into a vegetable garden and a mini fruit orchard/herb garden. Over time, I gradually added to these spaces through piecemeal purchases of individual plants. This approach worked reasonably well, allowing me to fill up most of my initial plot within under a year. However, when I later acquired a larger 10-acre property with 2.
5 acres of cleared land, my previous strategy wasn’t enough to transform the entire area in a timely manner. It would have taken around ten years to achieve the lush edible landscape I envisioned, spent battling weeds and trying to maintain our cleared land against encroaching woods. Considering my impatience, I decided to take a more proactive approach. I delved into gardening literature and discovered how to rapidly scale up plant populations through seed starting and stem cuttings.
While these methods proved effective, they still left me short of the number of plants needed to fill our larger plot.
What is Layering?
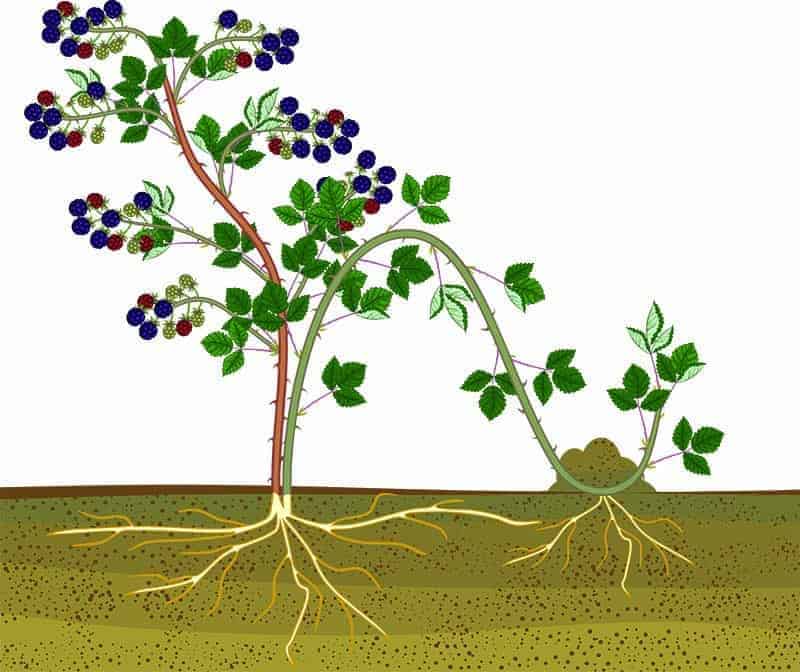
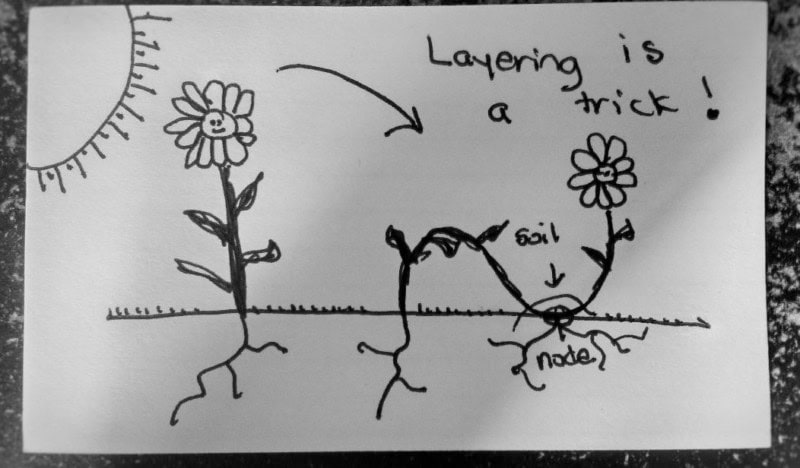
Layering, a natural process in horticulture, involves encouraging an above-ground stem to develop roots while still attached to its parent plant. This technique, also known as propagation by layering, allows new plants to mature while still supported by their parent, making it the easiest method with the highest success rate. In contrast, cuttings require more care and attention until they’re ready to thrive independently.
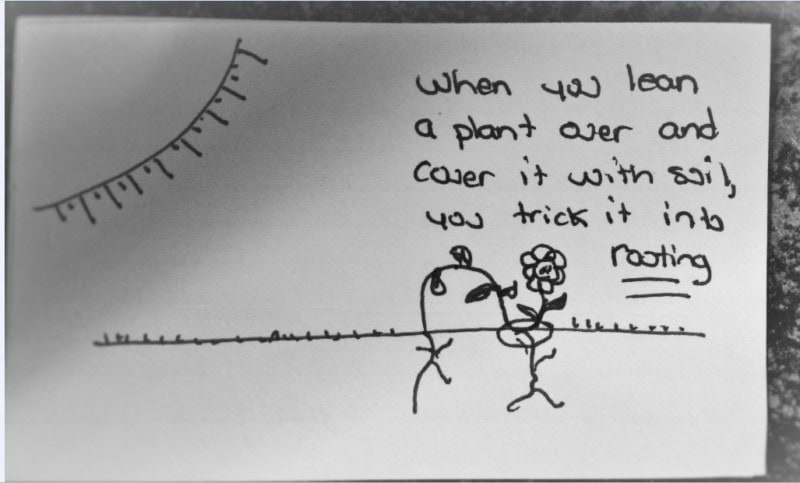
The process is eerily familiar for gardeners who’ve grown tomatoes or tomatillos – have you ever noticed how these plants grow new roots from their stems as they lean over? This technique mimics nature’s own layering process. When we propagate a plant using layering, we’re essentially tricking the stem into thinking it’s time to adapt.
As the stem and leaves change direction, this disruption in hormone distribution and directional drive creates an internal conflict within the plant.
Some parts want to reach for the sun, while others crave the soil. With prolonged contact between the stem and soil, the plant naturally grows roots, a testament to its resilience.
Plants to Propagate by Layering
Layering is a natural process for some plants, such as tomatoes and tomatillos, which can lay over easily and set roots without additional encouragement. Plants in the mint family are also prone to layering. However, not all plants have this ability. Some require stimulation to form new roots and grow into separate plants during the growing season. With a bit of coaxing, many fruit bushes like blueberries, raspberries, blackberries, goji berries, currants, and others can be layered successfully.
Vining plants such as grapes and kiwi are also easy to layer, while shrubby trees like elderberry, seaberry, and citrus fruits (lemon, lime, etc.) can be coaxed into producing new roots. Slow-growing herbs like lavender, rosemary, bay leaf, and others are great candidates for layering, as are decorative plants like hydrangea, forsythia, crepe myrtle, dogwood, and other ornamental shrubs.
Plants NOT to Propagate by Layering
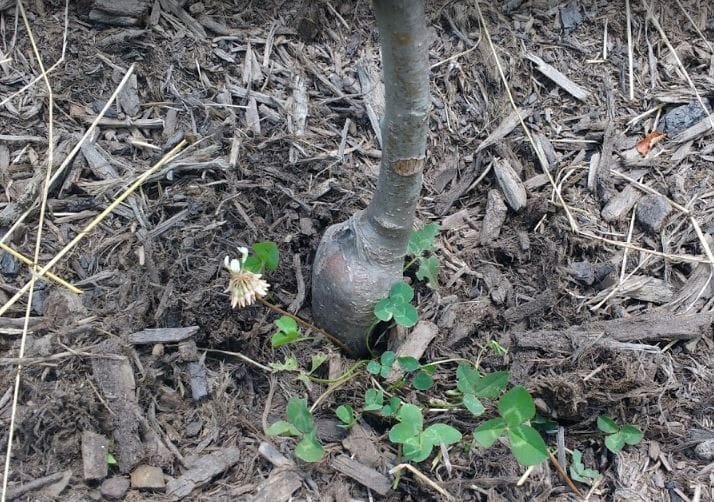
When attempting to propagate new plants using this method, it’s essential to avoid using grafted specimens. Grafting involves uniting a piece of stem from a desired variety onto a robust rootstock, often resulting in trees bearing desirable fruit or grapes. The presence of a noticeable bulb at the base of the plant below the graft is a telltale sign that it has been grafted.
If you were to layer such plants, you’d essentially be cultivating the tasty variety on its weakened rootstock, which may be susceptible to diseases and pathogens. This could lead to an infestation of unwanted organisms in your garden. It’s crucial to exclude these potentially weak and disease-prone plants from your garden. Furthermore, it’s vital to steer clear of layering patented plant varieties.
Patented plants are typically marked as such on any marketing materials used by the owner or their authorized dealers. If you’re familiar with the plant variety name, you can easily verify whether a particular specimen is patented by consulting online retailers.
How to Encourage a Plant to Layer
With the knowledge on which plants can and cannot be layered fresh in your mind, it’s now possible to put this technique into action and quickly propagate new plants. To create an ideal environment that fosters successful layering, follow these simple yet effective steps: take the chosen plant, prepare its stems for propagation by making clean cuts, and then carefully place them onto a suitable rooting medium, ensuring they’re securely in place to encourage healthy growth.
Step 1: Prepare the Soil
When it comes to layering your plant, it’s essential to provide it with well-prepared soil for optimal results. One approach is to do so directly in the ground near the parent plant. Alternatively, you can also use a pot filled with good quality soil. However, if you opt for container gardening, keep in mind that potted plants require more frequent watering due to their faster-draining potting soil compared to soil in the ground.
Step 2: Lean the plant over
Mastering the art of layering requires finesse and patience. When working with plants that have long stems like blackberries, grapevines, goji berries, kiwi, and others, gently arch a long arm towards your prepared soil, taking care not to invert leaves, which can lead to rooting. For shrubs and tree-like plants that may break or split if bent, carefully lay the stem over at a 90-degree angle (or greater) while the plant sap is high, avoiding periods of dormancy, drought, or flowering.
Plants with stiff stems like rosemary, lavender, aronia berries, fig, currants, seaberry, and elderberry should be layered before they flower, ideally in late summer or early fall when they’re stockpiling nutrients for winter dormancy. In some cases, layering may require a multi-stage approach: bend a branch or stem part way towards the ground, hold it in place with twine or a brick, and give the plant time to recover.
After a good rain or deep watering, bend the stem the rest of the way towards the ground or pot, allowing the plant to adapt gradually.
Step 3: Hold the layered plant in place
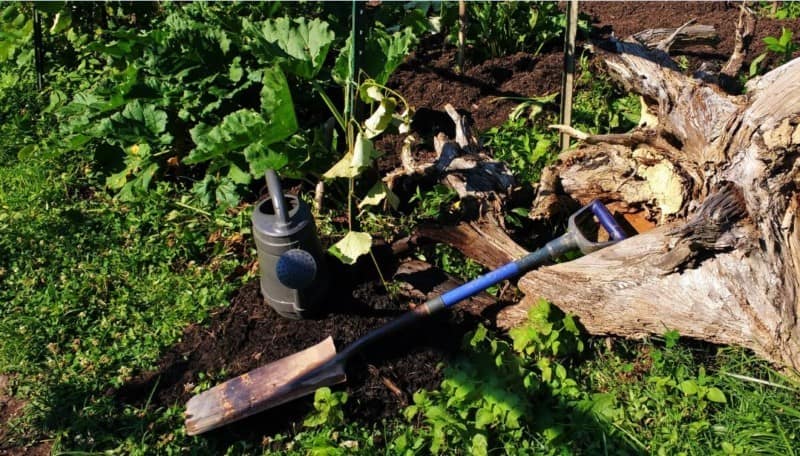
When propagating certain plants, it’s crucial to ensure they remain in a stationary position long enough for roots to establish. To achieve this, you can employ various weights to keep them down and allow for proper rooting. I find creative ways to utilize materials like broken ceramics, stones, water containers, or any other available resources.
This approach not only keeps the plants from shifting but also serves as a visual reminder to avoid accidentally cutting them during future weeding sessions.
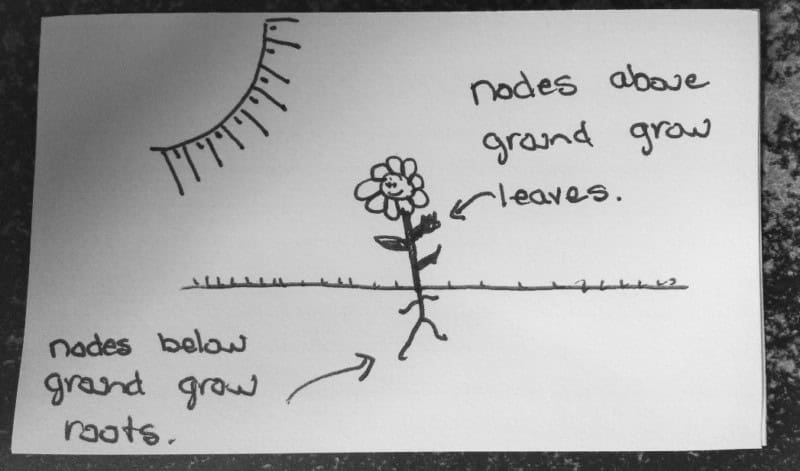
For optimal results, it’s essential to remove leaves from the section you’re layering and cover the node (where the leaves emerge) with soil. Next, position the weight directly above the soil-covered node, allowing the plant to settle in its new environment.
How to Separate Your Newly Layered Plants
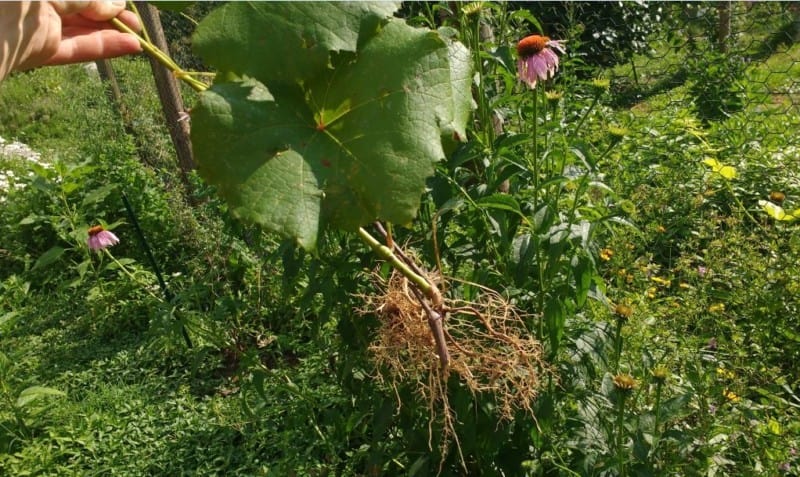
Layering plants is an art that requires patience and observation. The rate at which a plant layers can be telling of its rooting potential. Generally, faster-growing plants tend to root faster than slow-growing ones. With practice, you’ll develop a sense of when a new plant is ready to be separated from its parent. When I suspect good roots are forming, I gently tug on the stem and inspect the base of the plant.
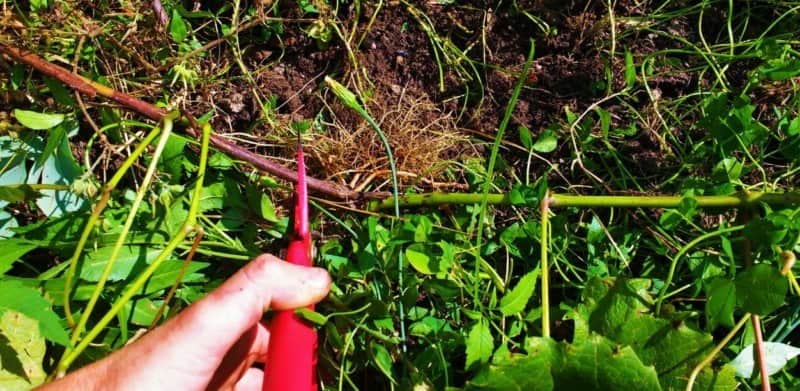
If I find at least an inch or two of robust root mass around and below the node, it’s time to make the cut. This allows the new plant to recover before being transplanted. In fact, I’ve found that giving my layered plants a few extra weeks after separation results in better growth and less transplant shock. Keep in mind that your new plant will have shallower roots than its parent, so ensure regular watering to prevent drying out.
Transplanting and Caring for Your New Plants
Once your layered plants have regained their health, adopt a nurturing approach akin to what you’d provide to a newly acquired potted specimen from the garden center. Begin by planting them in soil that’s been properly prepared for optimal growth. Ensure consistent moisture levels by watering regularly, taking care not to overdo it as this can hinder recovery.
To further promote root development and overall health, apply a layer of mulch to retain precious moisture and regulate soil temperature. Don’t forget to heed any specific growing guidelines peculiar to your plant variety – whether that’s administering targeted fertilizers at key intervals or maintaining a precise pH balance. Some layered plants may even benefit from copious compost application.
By treating your recovered layerings with the same care and attention you’d give to a store-bought potted plant, you’ll be well on your way to fostering robust growth and ensuring their long-term success.
Different Methods of Plant Layering
While we’ve already explored one type of layering, there are several other techniques you may find useful. From tried-and-true methods to more innovative approaches, let’s dive into a few different ways to achieve this effect in your work.
Simple Layering
This layering technique, often referred to as simple layering, is essentially a straightforward application of the concepts discussed earlier. It’s the most basic approach among its kind, and its name accurately reflects the simplicity involved.
Tip Layering
Unlike simple layering, where the middle part of the plant is bent, this technique involves using the tips instead. This approach is particularly effective when dealing with plants featuring sturdy stems or compact growth habits with shorter stems. By utilizing this method, you can achieve a desired level of spacing between the new plants, making it ideal for applications where a bit more room is needed.
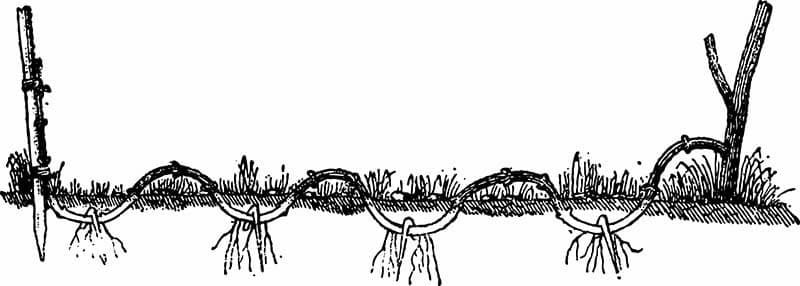
Serpentine Layering
A particularly effective technique for propagating vining plants like grapes is serpentine layering. By bending and burying the vine multiple times into the soil, you can create multiple new plantlets from a single stem, making it an ideal method for multiplying your grape harvest.
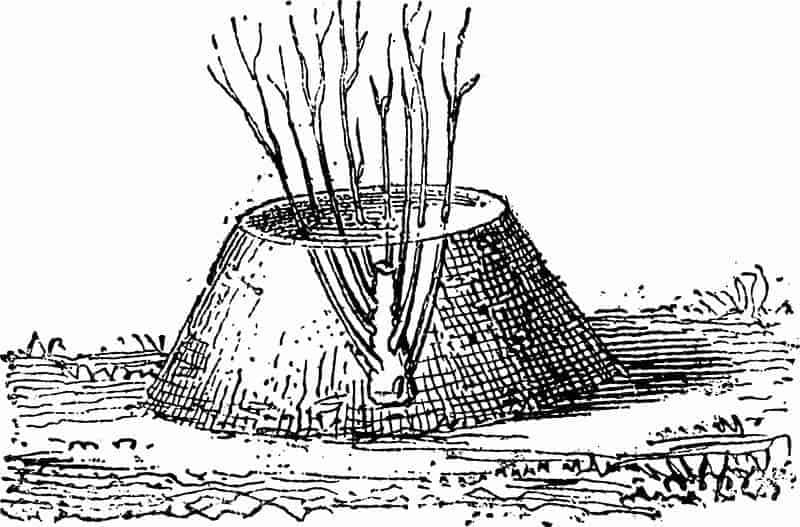
Mound Layering
To employ the mound layering technique, initiate by truncating the plant’s primary stem to approximately one inch above the soil during its dormant period. Subsequently, as the following spring unfolds, multiple new shoots will emerge from the stumped area. Once this occurs, encase or mound these shoots with soil and allow roots to develop from the covered stems. During the subsequent dormant season, you can then extract the newly rooted shoots.
This method proves most effective for robust-stemmed plant species, including shrubs and fruit trees.
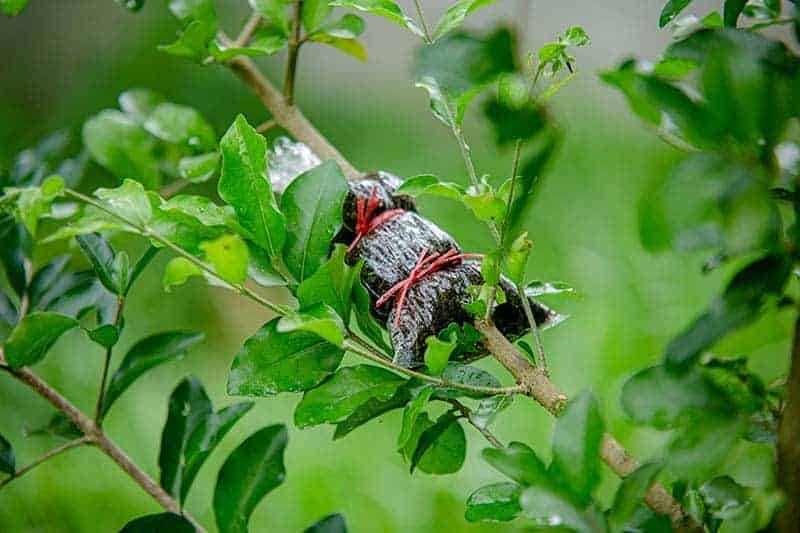
Air Layering
Air layering stands out from other ground-layering methods in that it doesn’t require soil at all, making it particularly well-suited for use with larger plants. This approach involves removing the bark from a healthy, 1-2 year old straight stem, and then covering it with a generous amount of moist sphagnum moss or coco coir. The stem is then wrapped in plastic, ensuring that both ends are securely sealed.
Over time, as you periodically check on the process, you should start to notice signs of new root growth developing inside the wrap. It typically takes around a year for this process to complete, at which point you can remove the wrapping and cut the stem, allowing you to propagate your plant.
Cut your Plant Budget with Layering
With the understanding of this technique now under your belt, you’re empowered to strategically scale up your plant population in a rapid and effective manner.
Tip 1: Buy 2 Get 10, 15, 20…
To multiply kiwi plants on my property, I initially purchased one male and one female kiwi plant from an edible landscape nursery. While a single purchase of 20 plants would have been ideal, the cost of $20 per plant made it impractical. The necessity to provide both male and female plants for cross-pollination was another consideration. Once I had my starting pair, I planted them in spring and began layering them in fall.
Come springtime, I dug up the new offspring and scattered them throughout my landscape. This method allowed me to quickly multiply my kiwi plants and increase their presence on my property.
When attempting to propagate other plant species, a similar approach can be employed. By purchasing at least one specimen of each variety you wish to duplicate, you’ll have the necessary material for layering new plants.
It’s crucial to select robust, vital specimens that will thrive in your landscape and produce healthy offspring. If cross-pollination is required, ensure you acquire at least two different plants capable of facilitating this process.
Tip 2: Start with a Healthy Parent Plant
When it comes to propagating plants through layering, it’s essential to prioritize the health and vitality of your starting material. Avoid attempting to layer weak or underperforming plants, as this can divert energy away from the parent plant and potentially transmit any underlying health issues to the new growth. Instead, focus on propagating only the strongest and most robust specimens, ensuring that your layered plants have the best possible foundation for success.
Tip 3: Use Good Plant Care Practices While Layering
To achieve success with layering, it’s essential to provide the same level of care as you would with traditional propagation methods. This means ensuring your plant receives consistent watering and nourishment from fertile, moist soil. It’s crucial to choose a time when your plant is thriving, rather than being stressed by environmental factors such as drought or excessive rain.
By doing so, you’ll be creating an ideal environment for the new growth to establish itself, increasing the chances of a healthy and robust outcome.
