In today’s homesteading world, food preservation is a hot topic. When you put in the effort to grow your own food, it’s only natural to want to make every harvest count. Not only does preserving food help reduce waste, but it also allows you to enjoy the fruits of your labor year-round. From freezing and canning to dehydrating and fermentation, there are numerous methods to extend the shelf life of your homegrown produce.
While all these techniques have their merits, I’m particularly fond of fermentation. Not only does it significantly prolong the freshness of your harvest, but it also transforms everyday foods into extraordinary culinary experiences. Once you grasp the fundamentals, fermentation is surprisingly straightforward. This comprehensive guide will walk you through everything you need to know about fermenting food.
Getting Over the “Yuck” Factor in Fermentation
Fermentation is often met with skepticism due to its unconventional process. However, it’s essential to understand that fermentation is simply an invitation to beneficial micro-organisms to pre-digest your fresh food. This concept can be unsettling at first, but when viewed in the context of our own digestive systems, where trillions of micro-organisms work tirelessly to break down our food, it becomes more palatable.
Moreover, consider the plethora of fermented foods that have become an integral part of human cuisine. Sourdough bread, cheese, yogurt, wine, beer, and condiments like ketchup, mustard, and soy sauce are all testaments to the power of fermentation. If you’re already a fan of these products, it’s likely you’ve unknowingly been benefiting from microbial magic. Fermentation also serves as a catalyst for self-awareness about the microorganisms that surround us.
When we start fermenting at home, we may encounter some unappealing aspects, such as gnats hovering around vinegar jars or white powdery residue on fermented vegetables. However, these phenomena are not unique to fermentation; they’re already present in our environment. For instance, those pesky gnats that appear during the vinegar-making process were likely already lurking in your home, drawn to the acidity of the fermenting mixture.
Similarly, the white yeast by-product found on ferments is the same substance that accumulates on wounds and containers of left-overs buried in your fridge. By embracing fermentation’s unconventional nature, we can transform our relationship with food and become more mindful of the microorganisms that surround us. This shift in perspective enables us to harness the power of fermentation, creating delicious and durable foods that would otherwise be susceptible to decay.
In essence, good fermentation practices make you a food hero, rescuing your culinary creations from possible spoilage and ensuring they remain a delight for years to come.
What is Fermentation?
In the realm of fermentation, the unappealing aspects are left behind, and the fascinating processes take center stage. Behind the scenes, tiny micro-organisms like yeast and bacteria work their magic, transforming the transient components in your food into something delectable and long-lasting.
These microscopic actors primarily feed on sugars or acids, producing natural preservatives as a byproduct.
This phenomenon parallels the way plants absorb carbon dioxide and release oxygen or how worms consume kitchen scraps to produce vermicompost for our gardens.
Fermentation can be viewed as nature’s recycling program in your kitchen! Just as cultivating good soil for plant growth or creating a suitable environment and offering preferred food sources to worms promotes healthy compost, we too can collaborate with nature to ensure successful fermentations.
To achieve this harmony, it’s essential to grasp the underlying principles of the process.
4 Ways to Ferment Food
When it comes to preserving food at home, fermentation is a popular and effective method among homesteaders. While there are various techniques involved, some approaches stand out as being particularly well-suited for this lifestyle. These methods offer a range of benefits, from enhancing the nutritional value of foods to creating delicious and unique flavors.
You can ferment foods using salt in an anaerobic environment.
The fermentation process typically begins by submerging vegetables in a solution that combines a high concentration of salt with water. This salt brine creates an environment that is too acidic for unwanted microorganisms, allowing beneficial bacteria to thrive. Additionally, covering the vegetables in water eliminates oxygen, making it anaerobic and ideal for the growth of micro-organisms responsible for preserving food through fermentation.
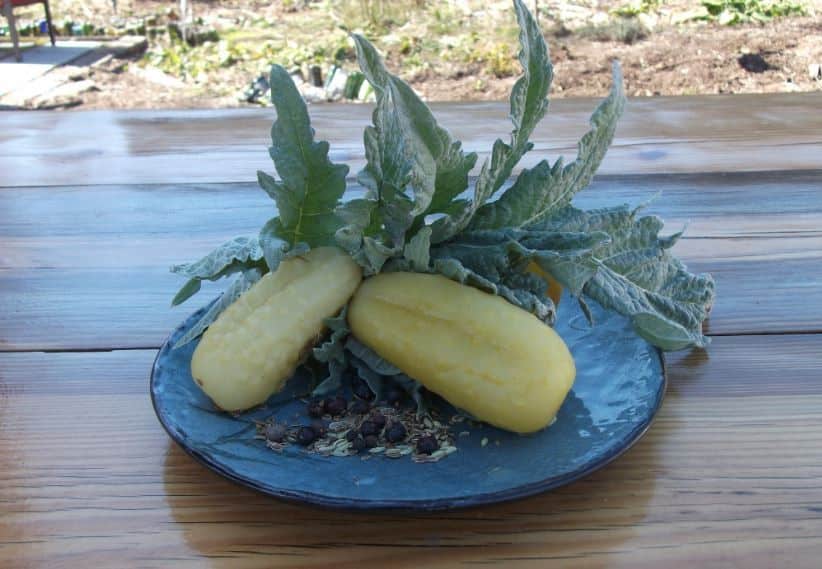
Classic examples of fermented vegetables include sauerkraut and kimchi, as well as condiments like fish sauce and soy sauce. Interestingly, even fish emulsion fertilizer is produced using this method, leveraging naturally occurring salt in fish parts. To initiate fermentation, a minimum salt concentration of 2% relative to the weight of your food is typically required. For instance, when fermenting one pound of cabbage to produce sauerkraut, you would need approximately .
32 ounces of salt (calculated as 16 ounces of cabbage multiplied by 0.02). This equates to roughly two teaspoons of salt per pound of vegetables, which is why recipes often specify using two teaspoons of salt per pound of vegetables instead.
You can ferment foods using salt in an aerobic environment.
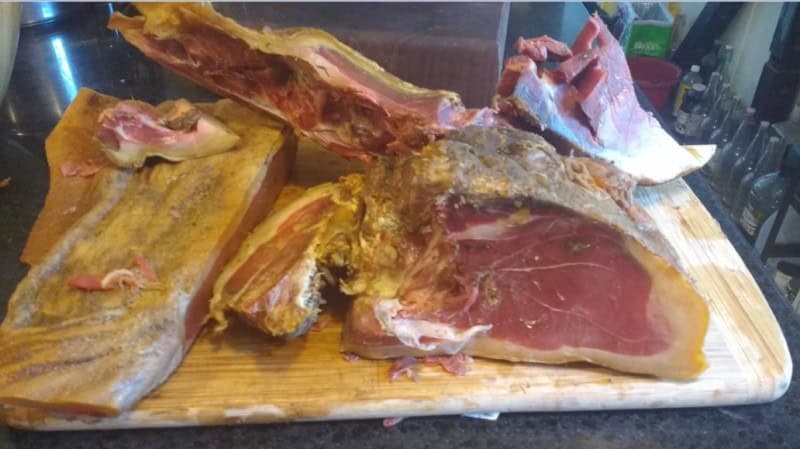
While traditional fermentation methods involve submerging food in a brine solution, another approach is to coat or rub food with salt, creating an acidic exterior that inhibits the growth of microorganisms. This technique is commonly used in country ham and bacon production, where the salt layer dries the surface of the meat, effectively creating an almost anaerobic environment inside.
However, if you simply applied a thin layer of salt to thinly sliced meats and exposed them to air, they would dry out quickly, without undergoing fermentation.
By using larger pieces of meat, you can slow down the drying process and restrict airflow to the interior of the food, allowing beneficial microorganisms to break down sugars and preserve the product. This process is responsible for the distinctive umami flavor found in cured meats like prosciutto and salami.
While this method can be effective, it also carries a higher risk of contamination due to the dry outer coating, which can create an anaerobic environment that fosters the growth of harmful bacteria. As a result, some producers use sodium nitrate in addition to salt when curing whole muscles or making fermented sausages, as a precaution against botulism and other undesirable outcomes.
You can ferment food using high concentrations of sugars in an anaerobic environment.
Fermentation enthusiasts often find themselves drawn to the process of turning sugary foods like grains, fruits, and milk into delicious treats. The right combination of natural sugars, aromatics, and added sweeteners like honey or sugar can attract the perfect blend of yeasts and bacteria. These microorganisms then convert the sugars into alcohol or curds, ultimately dying happy and content.
However, not all first-comers finish their job before meeting their demise, which is where human intervention comes in. By controlling moisture levels, air content, bacterial types, yeast strains, and temperatures, we can encourage the growth of desirable microorganisms that yield tasty and durable products.
For instance, cheese-making involves adding cultures to milk, regulating temperature and drying processes, while winemaking requires controlling air exposure, carbon dioxide release, and aging conditions. While mastering these techniques takes some know-how and equipment, homesteaders can still produce fine alcohols and cheeses with the right guidance.
Moreover, strong spirits like moonshine can be used as a natural preservative for food, resulting in unique treats like cherry or peach brandy ice cream.
You can ferment your ferments in an aerobic environment.
While some people intentionally ferment food to create alcohol or vinegar, others may unintentionally do so through accidents like forgetting to seal a wine bottle. I’ve fallen victim to this mistake myself, where a nightcap turns into a tart treat the next day. When foods with less than 17% ABV come into contact with air and aren’t properly sealed, acetobacter bacteria can convert the alcohol to acetic acid through secondary fermentation.
This process creates vinegar, which is a fermented product that can be used as a natural preservative for other foods like pickles, ketchup, and mustard. As a natural preservative, vinegar boasts a pH level of 4.6 or lower, making it an ideal environment where only bacteria that create it can survive. Once they’ve produced enough acetic acid, the environment becomes too acidic even for acetobacter, effectively killing them off.
It’s a self-sustaining process where the microorganisms thrive and then perish from their own handiwork. Before using your homemade vinegar for canning purposes, make sure you know its pH level to ensure it’s suitable for preserving food.
Make Some Ferments
With the fundamentals of fermentation under your belt, it’s time to put your skills into practice. To help you get started, we’ve curated a pair of easy-to-follow recipes that will have you experimenting with fermented delights in no time.
Sauerkraut
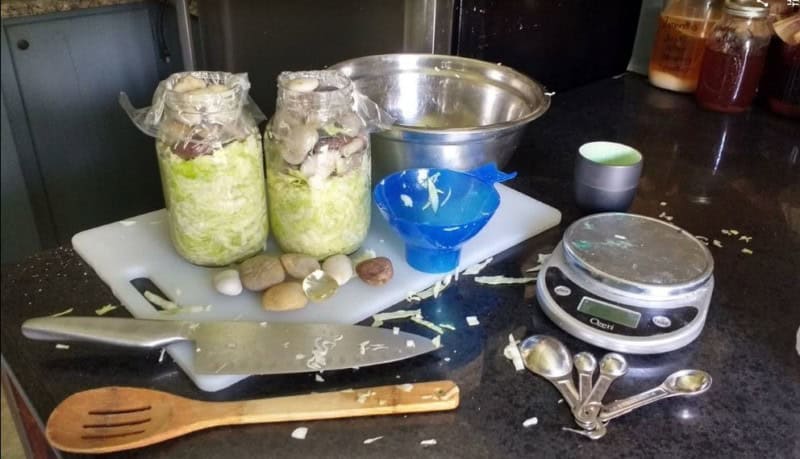
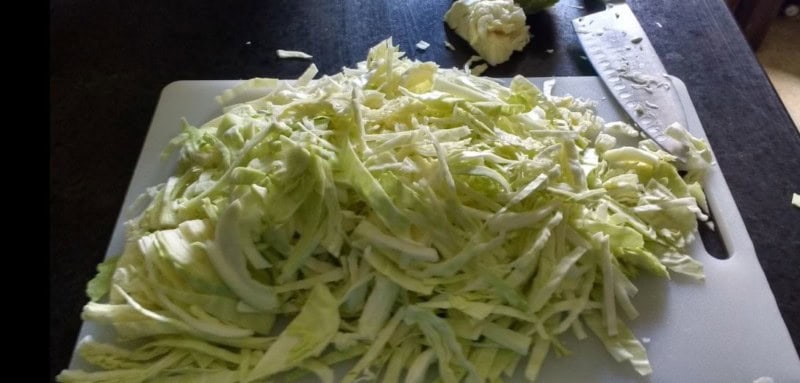
Starting your fermentation journey with sauerkraut is a great way to begin, as it requires minimal preparation and equipment. Cabbage is an affordable and versatile vegetable that can be used as the base for your fermented creation. With its natural moisture content, you won’t need to create a separate brine solution before adding other vegetables. Simply chop one head of cabbage into fine pieces and weigh it.
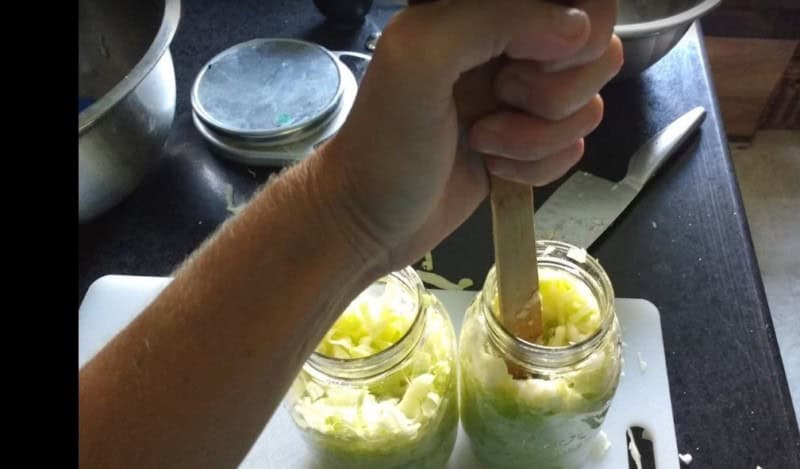
To calculate the amount of salt needed, multiply the weight of the chopped cabbage by 2%. Then, massage the calculated amount of salt into the cabbage leaves until they’re evenly coated. You can also add some caraway seeds to give your sauerkraut a unique flavor. Transfer the cabbage mixture to mason jars and use the end of a wooden spoon to press down on the shredded cabbage, releasing some of its natural juices.
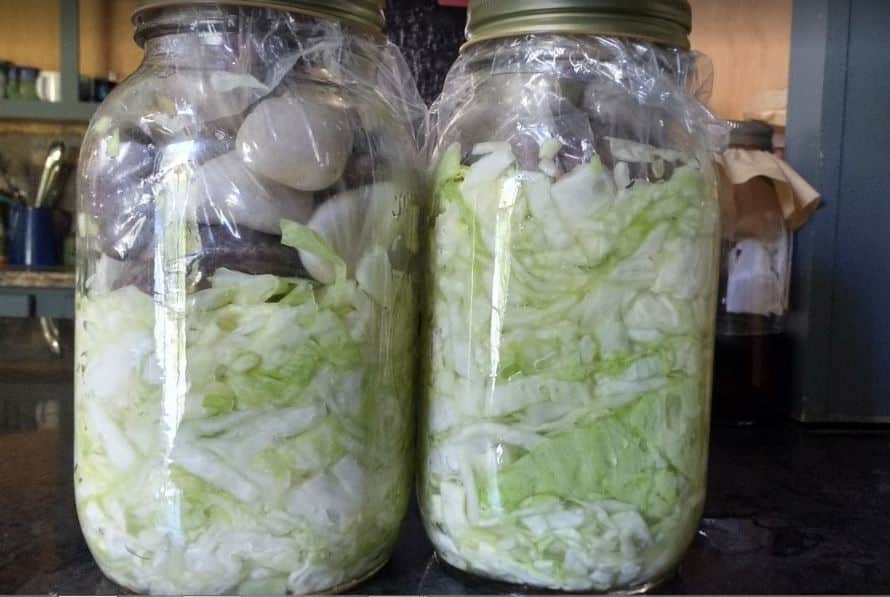
Weigh down the cabbage with a baggie filled with rocks or fermentation weights to keep it submerged in the liquid. Close the jars with a lid that has an airlock, if you have one, or simply use a regular lid. Once daily, open and close the jars to release any trapped carbon dioxide. After a week, taste your sauerkraut to see if it’s reached the desired level of sourness. If not, allow it to ferment for a few more days.
Once you’ve mastered the art of fermenting cabbage, you may find yourself experimenting with other vegetables and ingredients, from cilantro for tacos to wild-ferments featuring weeds from your garden. The beauty of simple salt solution fermentation is that it’s hard to go wrong!
Duck Breast Prosciutto
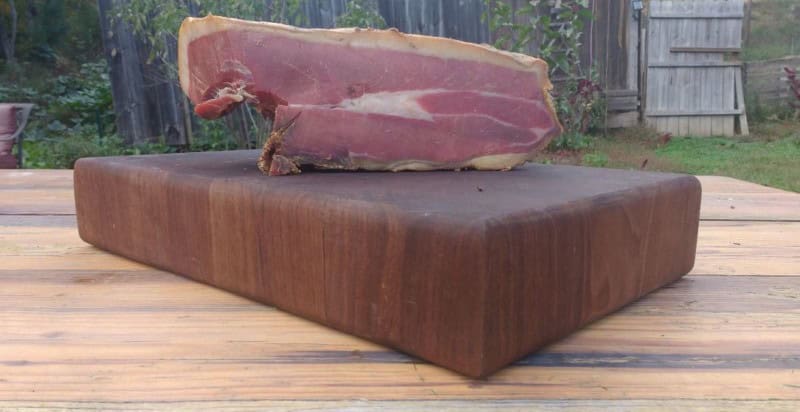
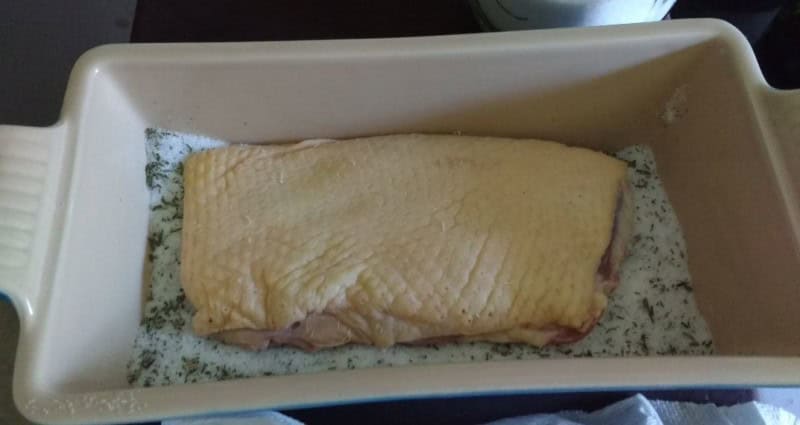
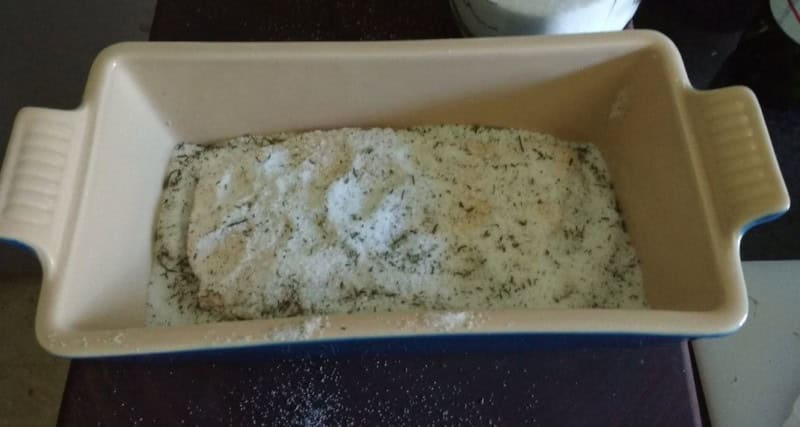
While it’s tempting to dive into large-scale meat fermentation projects, there are many benefits to starting small. In fact, you can begin with a relatively modest piece of meat like a duck breast. To get started, simply bury the fresh breast in sea-salt and store it in the fridge for two days. After removing it from the refrigerator and wiping away any excess salt, wrap the breast in a light cloth to protect it from insects.
Next, hang the breast in a cool, dark location with a temperature range of above freezing to below 75°F (or 24°C). Depending on the humidity levels, this process can take anywhere from one to seven days. Once the desired level of dryness is reached, you can store the duck breast in an environment with around 55-60% humidity, such as a cellar or basement. Alternatively, you can serve it immediately after slicing it thinly.
For added flavor, consider infusing your sea salt with thyme by mixing fresh cut herbs with the salt and allowing it to absorb the flavors for two weeks. You can then use this flavored salt when salting your duck breast. Or, simply add fresh thyme to your salt for a burst of herbal flavor. It’s essential to note that consuming uncooked meats carries serious foodborne risks.
As such, we strongly recommend conducting thorough research and making informed decisions about whether or not to attempt this process at home. While I personally enjoy this type of meat regularly, it’s crucial that individuals take responsibility for ensuring the safety and health of themselves and their loved ones.
Conclusion
Embark on a flavorful escapade into the realm of ferments! As you navigate this journey, I invite you to explore and experiment with each fermentation method, gradually building your skills. By doing so, not only will you become a master of food preservation, but also a celebrated culinary innovator.
