The notion of the $64 tomato may have originated from a book by William Alexander, an avid gardener who invested heavily in his garden’s design and construction. Although I haven’t read the book myself, the title has had a lasting impact on many aspiring gardeners. Despite being published in 2006, the idea still sparks discussions today.
As I delved into the story behind this expensive tomato, I discovered that Alexander spent approximately $300 on garden design, over $8,500 on initial construction, and an additional $1,100 on irrigation systems. He also paid $300 for stump removal and $1,200 for steel edging. The total expenditure was staggering, amounting to nearly $17,000. It’s clear that Alexander wasn’t a homesteader; had he been one, he would have likely done the work himself, saving thousands in the process.
Garden Hacks for Homesteaders
For those seeking the perfect tomato at a price tag of $64, Mr. Alexander’s approach is certainly worth exploring. However, for those looking to score fresh and delicious produce without breaking the bank, I invite you to discover a collection of low-to-no-cost garden hacks that can significantly reduce your grocery expenses.
Pest Prevention
Gardening woes are a universal concern, and pests often prove to be the most frustrating hurdle. In my own experience, I’ve had to contend with deer, voles, and chipmunks that seem determined to help themselves to my garden bounty. While traditional fencing can provide some level of protection, it’s not always the most effective solution against these resourceful critters. Sometimes, a combination of creative, low-cost strategies proves more potent than investing in expensive barriers.
Fishing Line Deer Fence
Instead of investing in pricey and cumbersome fencing materials, consider constructing a deer fence using fishing line as an affordable and lightweight alternative. You’ll need posts, but you can easily cut those yourself from trees requiring thinning or bamboo for a sustainable solution. I utilize this method around my new orchard areas to safeguard the bark of my young trees from deer predation.
To ensure maximum effectiveness, I recommend running the lines every 12 inches and extending them up to 8 feet tall.
While the fishing line fence is an effective deterrent, it’s not foolproof. Determined deer may occasionally jump or break through the line. To exacerbate the issue, I install a few overhead lines that become entangled in the deer’s movements when they attempt to breach the barrier.
The experience is so harrowing that they tend to avoid attempting to cross again for several months.
Occasionally, deer may still manage to break through by running into the line. As such, it’s necessary to periodically re-run the lines to maintain their integrity. Despite this, the benefits of using fishing line fencing far outweigh the drawbacks, offering a low-labor and low-cost solution for protecting your garden areas from deer.
Blood Barrier
When it comes to managing pests on your homestead, using unconventional methods can be surprisingly effective. For example, the blood from animals you’ve butchered can be used to deter rabbits from entering your garden. One approach is to collect the blood in a bucket with water and then pour a ‘blood barrier’ around the perimeter of your garden. This method requires regular refreshing every 4 weeks during the growing season.
Another technique is to mix the blood with straw or mulch, which can be spread around the garden to not only deter rabbits but also act as fertilizer for any surrounding flowers. This dual-purpose approach can be a clever way to make use of resources and keep pests at bay.
Flower Powered Fence
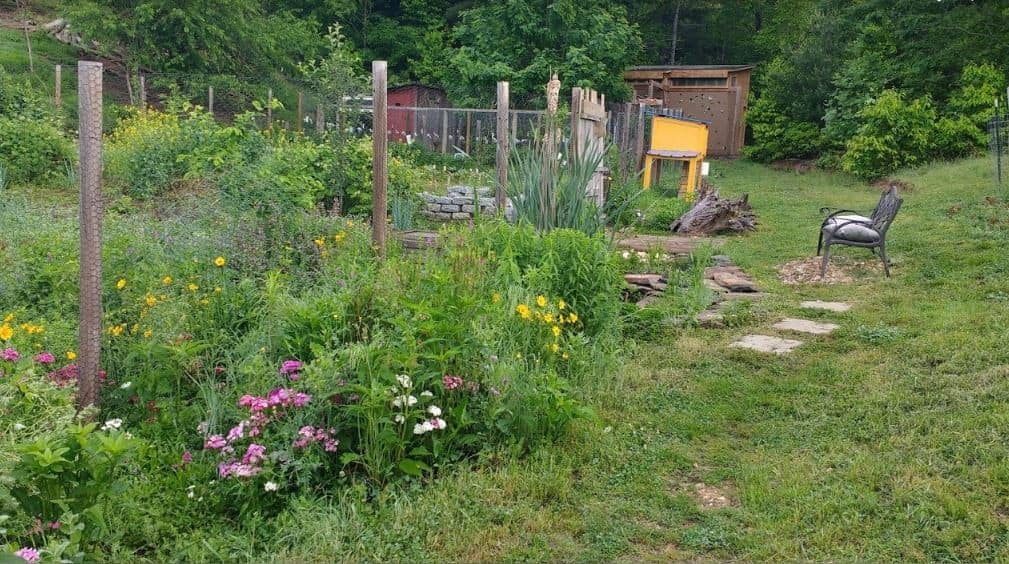
By incorporating certain flowering plants into your garden design, you can create a natural barrier against plant-eating pests. For instance, I grow a variety of flowers like marigolds, sweet alyssum, snapdragon, and many mints that not only add visual appeal but also serve as deterrents for unwanted visitors like rabbits and voles.
To maximize their effectiveness, I plant these flowers thickly along the edges of my garden, creating a 4-foot wide border that is unappealing to rabbits and difficult for voles to access, thus protecting the roots of my plants.
Soap on a Rope
The concept of soap on a rope might not be ideal for gift-giving, but it surprisingly proves effective in deterring deer from your garden. The more potent and pungent the soap, the better it serves its purpose. Irish Spring is a popular choice, while other strong-smelling options like those 3-for-$1 varieties can also get the job done. To utilize this unconventional method, simply tie the soap to stakes or plants around your garden, spaced about every five feet.
The overwhelming stench will prompt deer to vacate the premises – although, it may not be as pleasant for humans either. As someone who’s had their fair share of unpleasant experiences with these types of soaps, I personally prefer a more fragrant alternative like a flower-powered fence.
Noise Makers
By generating noise, you can effectively deter deer and other sneaky garden thieves. One creative method involves tying together a collection of tin cans and setting them up on a fence post or wall. Next, stretch a trip line across a portion of your garden. When unsuspecting critters trigger the trip line, it will pull down the tin cans, causing them to clatter and clang loudly. The startled animals will quickly flee the area in response to the commotion.
While this noise-making idea can be effective, keep in mind that it may also be disturbingly loud if your garden is situated close to your home. For those who prefer a more subtle approach, there are alternative methods worth exploring.
Let There Be Light!
While nocturnal critters like deer and digging animals can wreak havoc on your garden when left unchecked, there’s a simple yet effective way to deter them: installing motion-sensing spotlights. These battery-powered lights can be placed strategically throughout your garden to scare off night-roaming pests. However, these clever creatures are not easily fooled.
To maintain their effectiveness over time, it’s essential to periodically relocate the lights and adjust their angles to keep them guessing.
Raised Beds
Raised beds have gained widespread popularity in recent times, and their versatility is one of their biggest selling points. You don’t necessarily need a dedicated garden space to use them; they can be easily set up on your lawn, filled with soil, and used to grow your own food. However, when you need to create multiple raised beds, the cost of materials can quickly add up.
Fortunately, there are some creative homestead alternatives that offer similar benefits to raised beds but at a lower financial cost.
Raised Keyhole Bed
Keyhole beds are a fundamental component in permaculture gardening, exceling in situations where soil is contaminated or plagued by voles. The versatility of these beds allows for creative placement, even in unconventional locations like parking lots atop blacktop. To elevate the gardening experience and eliminate the need for bending, you can build raised beds to waist level or higher. The key to success lies in sourcing materials and showcasing your construction skills.
My own keyhole bed, as illustrated above, was constructed using a combination of scavenged materials, including a broken picket fence, wire fencing remnants, and cut bamboo and poplar. A sturdy base was established using feed bags, branches, and rocks.
Hugelkultur
Creating a hugelkultur is a simple yet effective way to turn yard debris into nutrient-rich compost that can be used to grow healthy plants. The process begins by collecting large logs, which are then topped with branches and filled in with lawn clippings, leaves, and kitchen scraps. As the materials decompose, they release valuable nutrients that can be absorbed by nearby soil, reducing the need for synthetic fertilizers.
In addition to providing a natural source of compost, hugelkulturs also help to prevent soil erosion and conserve water. This sustainable gardening method has been used on my homestead with great success, and I’ve found it to be an excellent way to create thriving gardens without relying on traditional raised beds.
Fresh Cut or Fallen Trees
You can choose from various types of wood for your raised beds, and forest-fresh wood is an excellent alternative to milled lumber. It not only adds a charming rustic touch but also serves the same purpose in terms of its durability. As this untreated wood decays, it enhances the soil quality and retains moisture within your beds. This means you’ll need to fertilize and water less frequently, making it a more sustainable option.
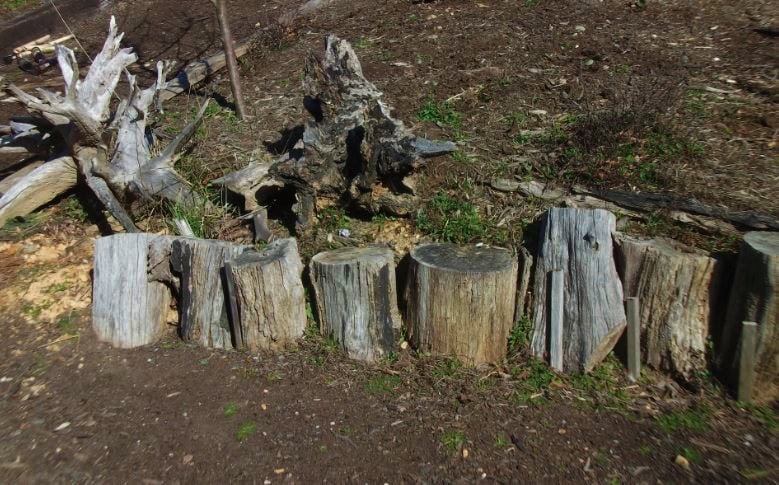
In my garden, I’ve created numerous raised beds using young poplar and pine trees that grow abundantly in our nearby woods. These trees are often too abundant for their own good, requiring thinning to maintain the forest’s balance. You can stack them between garden stakes if you need to build a taller bed.
Occasionally, we also experience natural tree falls due to age or environmental factors.
Instead of discarding these large trees as 8-foot lengths, I repurpose them as stumps, approximately 18-24 inches in diameter, to create the base for my raised beds.
Reverse Raised Beds
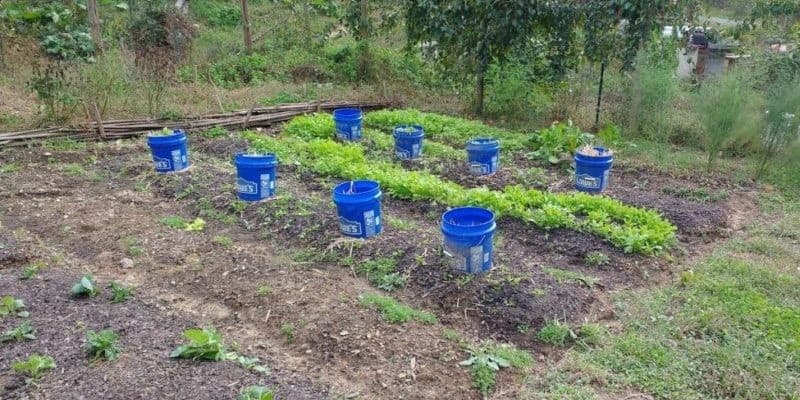
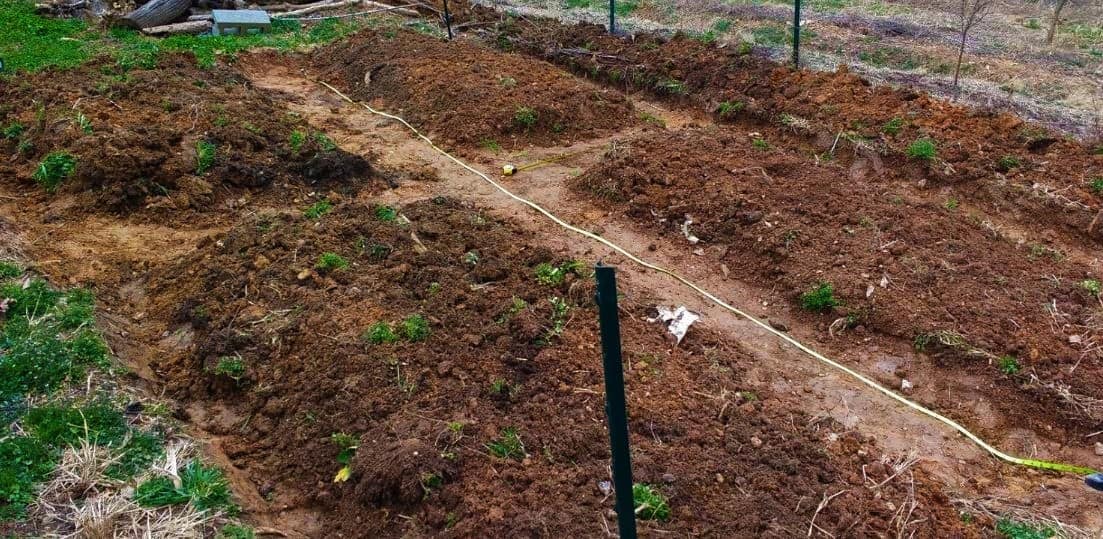
One creative way to create a raised bed effect is by flipping the concept altogether. Instead of building up, I dig out my pathways and use the topsoil that’s left over to create a natural mound above my garden beds. This technique, which I call a reverse raised bed, offers multiple benefits.
The decomposing materials in the paths – such as grass clippings, rotted hay, livestock litter, leaves, and hardwood mulch – not only enrich the surrounding soil but also serve as a water-holding reservoir for plants. Essentially, your garden paths become mini swales that enhance soil health and reduce the need for additional watering. The increased soil mass on top of the beds also gives them a raised appearance without requiring any physical boundaries or sides.
Simply backfilling the paths with composted materials and keeping the beds consistently amended ensures a thriving and visually appealing garden.
Compost Tools
As a novice gardener, I initially fell prey to the allure of high-end compost tumblers, investing nearly $100 in one such product. However, my experience was far from ideal – turning it became a chore, and its yield was woefully insufficient for my garden’s needs. To add insult to injury, it suffered a premature demise within a year. Today, I’ve come to realize that there are significantly more efficient and effortless methods of composting.
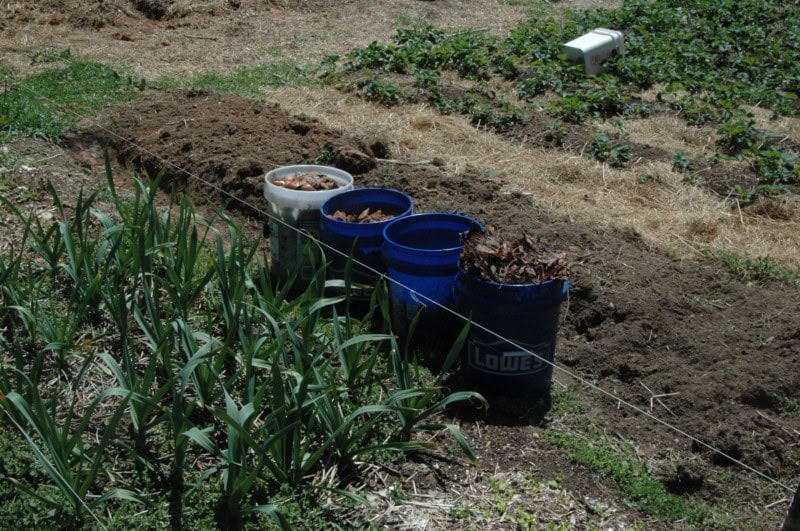
Trench Composting
Composting in your garden just got a whole lot easier with trench composting! This method involves digging a trench, layering ‘browns’ and ‘greens’, and then covering it back up. Not only is this approach the simplest way to turn waste into nutrient-rich soil, but it also dramatically boosts the life and fertility of your soil as it breaks down.
Vermicomposting
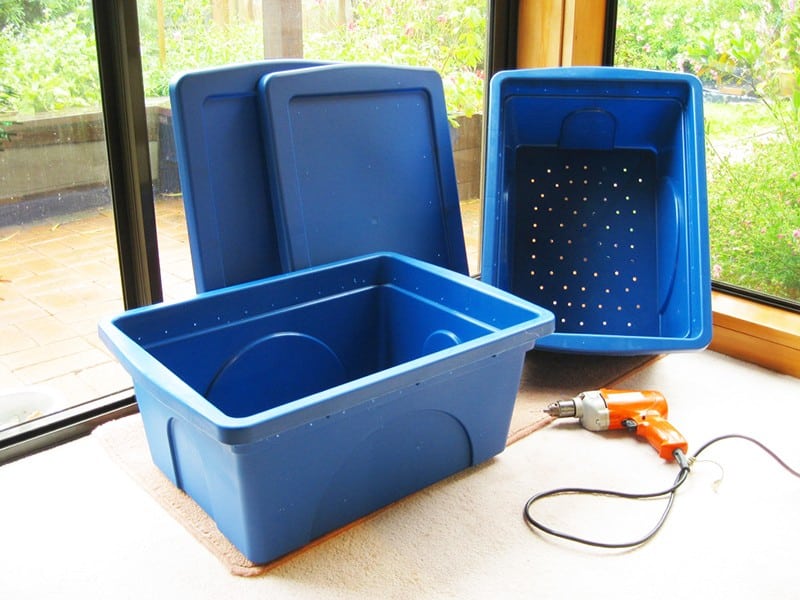
One of the most valuable and eco-friendly gardening resources is vermicompost, also known as worm castings or worm poop. While it may be tempting to purchase this organic fertilizer, a single pound of worms can provide a lifetime supply at no additional cost. By investing in a one-time starter kit, you’ll have all the necessary materials to create your own vermicompost bin.
Alternatively, get creative and repurpose items like tote boxes or plastic kitty litter pails – if you happen to know someone with feline friends, you might even score these containers for free! With a little ingenuity and resourcefulness, you can harness the power of worms to enrich your garden without breaking the bank.
No Bin Compost
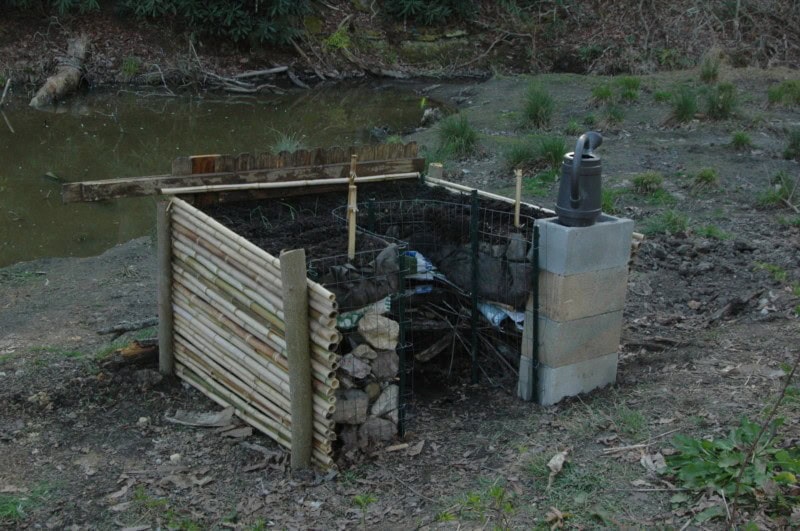
Composting doesn’t require a traditional bin; simply gather a large collection of organic materials and create a designated area for decomposition. You can define the boundaries using garden stakes, marking out a 4×4 foot space. Alternatively, you can omit the stakes altogether if you prefer a more free-form approach.
If you reside in an area prone to excessive rainfall, consider covering your pile with a tarp or plastic sheet to prevent waterlogging and maintain a healthy composting environment.
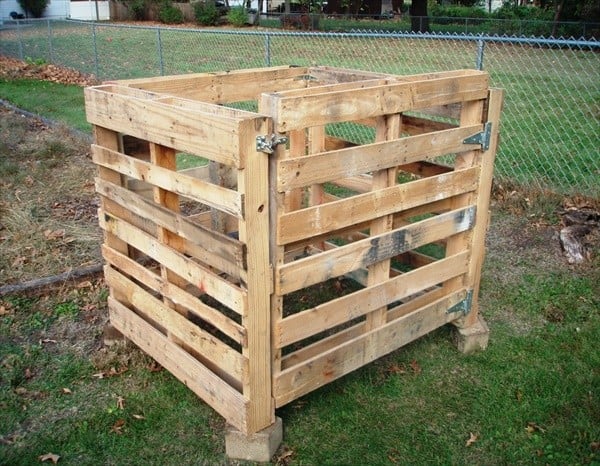
Free Pallet Compost Bin
Creating a compost bin using free pallets is a fantastic way to recycle and upcycle, while also adding a rustic touch to your garden or farm. To make one, you’ll need four pallets and some hinges if you want to add a door. This will not only keep large animals like livestock guardian dogs out of the bin but also provide easy access for maintenance and monitoring.
Homemade Fertilizers
While conventional gardening methods may rely heavily on synthetic fertilizers, organic gardening takes a distinctly different approach. The thought of applying a generic 10-10-10 formula from the hardware store can be daunting, as it can severely damage our soil’s delicate ecosystem. In contrast, creating an organically rich garden demands a thoughtful combination of various natural amendments.
As homesteaders, we’re fortunate to have other activities that generate these valuable resources at little to no cost.
Calcium
Calcium plays a pivotal role in plant development, with some plants like tomatoes relying heavily on it for growth. To incorporate this essential nutrient into your garden, one of the simplest methods is to utilize eggshells as a calcium-rich additive. A blender and water can be used to create a calcium-enriched liquid fertilizer by grinding up the shells and mixing them with water. Alternatively, you can grind the shells in a food processor or crush them by hand for a dry application.
Potassium
When it comes to adding potassium to your garden, you may find it challenging to obtain sufficient quantities. However, if you’re a banana enthusiast, you might be surprised to learn that the solution lies in repurposing the peels of your favorite fruit. By simply mincing the peels and incorporating them into your garden beds, you can harness the power of nature to decompose these organic matter and release potassium as a slow-releasing fertilizer.
The soil life will take care of breaking down the peels, providing your plants with the essential nutrient they need to thrive.
3 for 1 Mineral Source
When it comes to gardening, wood ash is a valuable resource that’s often overlooked. As a byproduct of burning wood, it’s rich in essential minerals like calcium, potassium, and phosphorous. These nutrients can be particularly beneficial for plants that require an extra boost of these elements.
However, it’s crucial to use wood ash with caution. Like pulverized lime, it has the potential to significantly alter your soil pH if not applied judiciously.
As such, it’s best to apply a thin, transparent layer to the surface of beds where you suspect deficiencies or want to provide an extra dose of these beneficial minerals.
Compost Tea
When you’re creating compost, you can also produce a nutrient-rich fertilizer known as compost tea. To get started, create a makeshift ‘tea bag’ by placing a thin towel or old pillowcase over the compost. Submerge this bag in a drum of water in a warm location, allowing it to steep for several days.
As you wait, periodically stir and agitate the liquid to encourage the growth of beneficial bacteria.
After around 7-10 days, remove the tea bag and spread the resulting compost over your garden beds. The remaining liquid can then be used as a spray to deliver an instant boost of nutrients and beneficial microorganisms to the undersides of your plant leaves every 5-7 days.
Garden Tools
When it comes to equipping your homestead garden with hand tools, I suggest investing in high-quality basics that will serve you well over time. While it’s possible to get by with just a few essentials, having multiples of certain items can make maintenance and repair tasks much easier to handle. One cost-effective way to achieve this is to create your own extras from scratch, eliminating the need for additional purchases and keeping your budget in check.
Watering Cans
Transforming a humble plastic container with a twist lid into an efficient watering can is easier than you think! To get started, simply drill a few holes in the cap to allow water to flow freely. Next, create an air release valve by drilling a small hole in the opposite corner of the cap. This will help prevent any potential pressure buildup and ensure a smooth watering experience. To fill or dip water, simply open the cap and tilt the container to pour the desired amount over your plants.
Place the container next to each plant in need of hydration, filling it up as needed on a weekly basis. As you observe your plants’ thirst levels, simply tip the can to give them a refreshing drink whenever they require it.
Measuring Cups
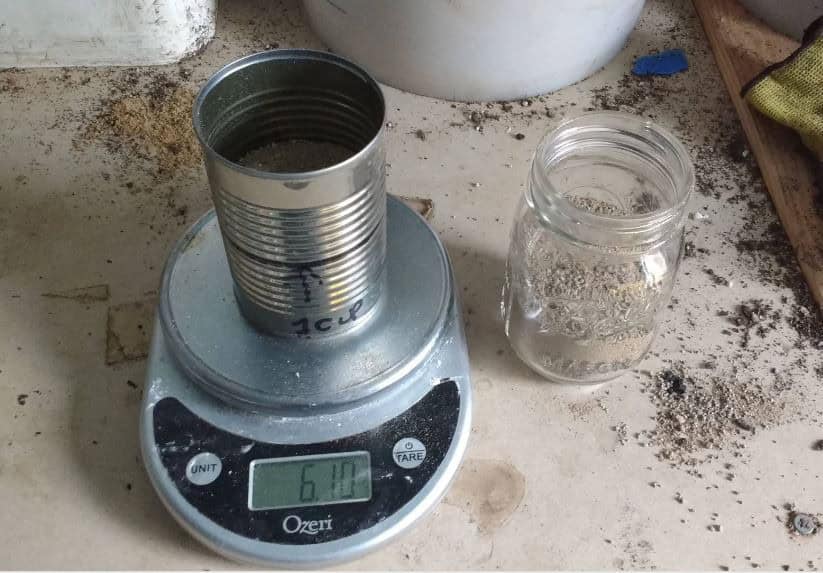
When purchasing commercial-grade soil amendments, the application rates are typically provided in pounds. However, most small-scale bags of soil amendments sold at hardware stores and other retailers offer guidelines for application based on cups. This used to drive me crazy as I would have to scramble around to find a measuring cup. Now, I take a simple approach: I measure out a standard cup amount into an empty tin can and mark the level.
I make myself about 10 of these makeshift measuring cups to keep in my potting shed, greenhouse, or other designated garden storage areas. Alternatively, you could use a mason jar as a measuring device, though I prefer these for indoor use since glass can be prone to shattering due to freeze-thaw cycles. Having these marked cans at the ready has streamlined my gardening process and eliminated any frustration I once experienced.
Conclusion
Gardening, in my opinion, should be a fundamental right for all individuals. It’s unfair to limit this joy to those who can afford it, as evidenced by the exorbitant cost of certain produce. The idea that a single tomato can set someone back $64 is absurd. Instead of allowing financial constraints to dictate our gardening pursuits, I believe we should strive to be resourceful and innovative in our approach.
With a little creativity, there’s no reason why anyone can’t cultivate a thriving garden without breaking the bank. In fact, I’m confident that many people would find it more rewarding to grow their own produce than shell out exorbitant prices at the market. Let’s make gardening accessible to all, and leave the pricey tomatoes to those who insist on paying a premium for them.
